Create an Alert
Alerts are created to notify users of certain activities regarding their units. The different types of alerts include the following:
-
Activity — the alert is generated when a unit transmits a number (or range) of packets within a certain number of days. Refer to for more information.
-
Data — the alert is generated when an alarm event occurs at a unit's data point. Refer to for more information.
-
Packet — the alert is generated when a unit transmits a packet. Examples of packet types include Alarm, Event, Health Check, Instant Off, Interruption, Low Battery, Normal, Power On Reset, Profile, Startup, and Test. Refer to for more information.
-
Status — the alert is generated when a unit changes from one operating state to another, such as from normal to alarm, open to close digital state, or normal to interrupting. Refer to for more information.
Complete the following steps to create a new alert:
Hover your mouse over ![]() to view a description of a field.
to view a description of a field.
-
Navigate to the unit from any of the unit information pages, such as All Units.
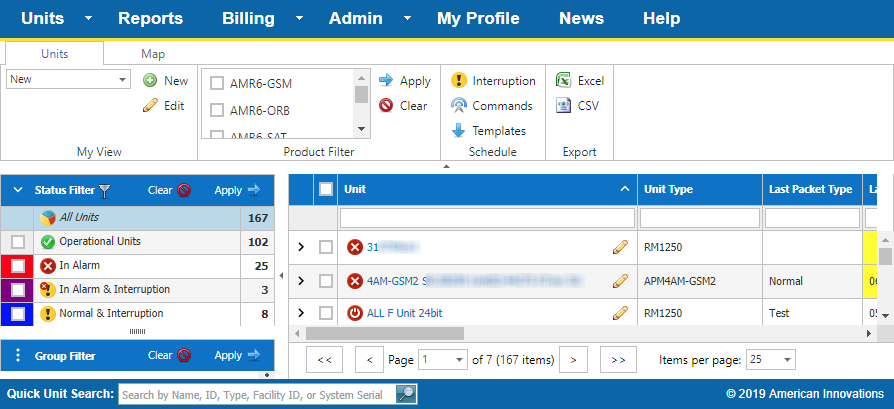
All Units Page
-
Click the
 icon next to the unit name.
For units listed on either the Unit System Status page or Detailed Unit Status page, first click the name of the unit and then click
 Settings.
 -
Verify Installed (Notifications ON) is selected in the Service Status field of the Info tab. See Note 1 for related information.
-
Click
 Alerts in the Unit Setup pane.
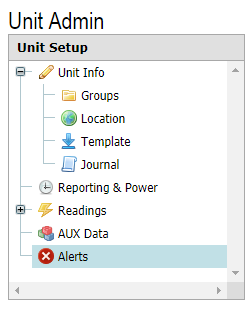
Alerts Link in Unit Setup Pane
Some units may use the following Unit Setup pane:
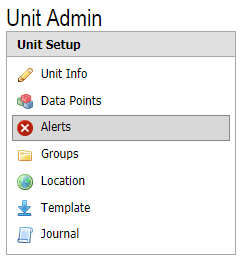
Unit Setup Pane for Older Units
-
Click
 New Alert in the Alerts pane.

Alerts Pane
-
Type a name for the alert in the Name field.
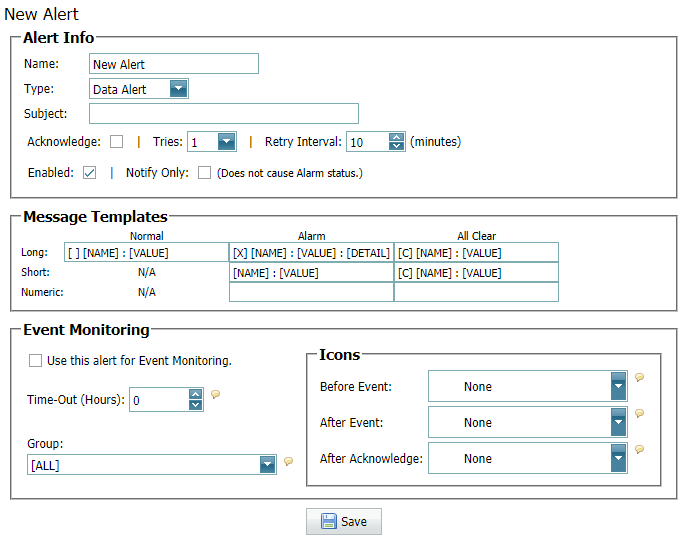
New Alert Set Up Pane
-
Select an alert type from the Typedrop-down field.
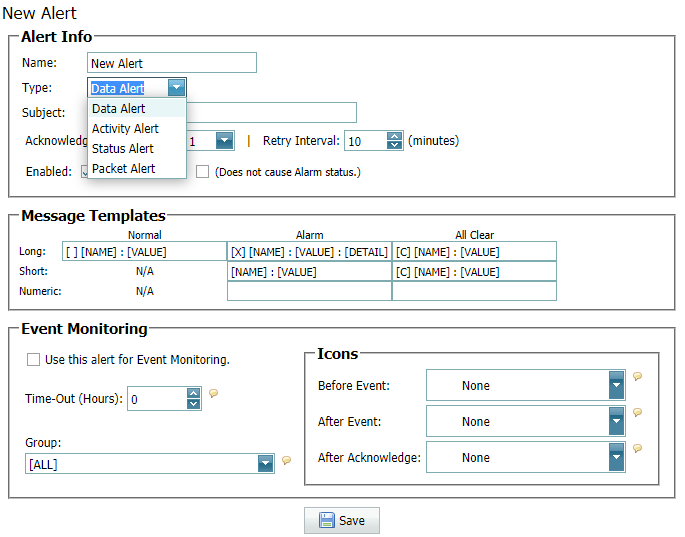
Alert Type Drop-down List
The only difference between creating one type of alert from another is how the message templates are formatted.
-
Type a description for the alert and/or enter template tags in the Subject field.
-
If you want a user to acknowledge the alert, complete the following steps:

Alert Info Fields
-
Check the Acknowledge check box. See Note 3 for related information.
-
Select a number in the Tries field to select how many times the system should resend the notification until the alert is acknowledged.
-
Type a value or use the arrow buttons in the Retry Interval field to indicate the number of minutes between repeated notifications.
-
-
Check the Enabled check box to enable the alert.
-
Check the Notify Only check box if you want the system to place the unit in the Normal status category instead of the In Alarm status category. Refer to Unit Status Category Icons for more information on these icons.
-
In the Message Templates section, define the message format of the notification by entering message template tags in the Long, Short, and Numeric fields. Or use the provided default settings. Refer to Alert Message Template Tags for more information about these fields.

Message Templates Fields
-
In the Event Monitoring section, check the Use this alert for Event Monitoring check box to set up optional event monitoring for a new packet alert.

Event Monitoring Fields
-
Enter a time or use the up and down arrows in the Time-Out (Hours) field to set a time (in hours) the unit should wait before resetting the event.
-
Select a unit group in the Group field.
-
Select icons for Before Event, After Event, and After Acknowledge. These icons are used when viewing the unit on the Monitor Page or on the alert notification window of the All Units page. Refer to Acknowledge an Alert for more information on how these icons display for alerts.
-
Click
 Save.
Save.
Note 1: Alert and Notification characteristics based on a unit's service status: If a unit's Service Status is set up as Inactive on the Info tab of Unit Admin, the system does not process alerts. A unit's service status must be set up as Installed (Notifications ON) in order for the system to send a notification to one or more contacts.
Note 2: Broadcast and Fall-Over characteristics when using Delay time: When using Delay time with the Broadcast option, the system waits the specified delay time and then sends the notification to the entire contact group. With the Fall-Over option, the system sends a notification to the contact group one user at a time; waiting the specified delay time between one notification and the next.
Note 3: Fall-Over characteristics when a notification is acknowledged: The system automatically enables the Acknowledge check box when an alert is set up with the Fall-Over option. When a user in the Fall-Over contact group acknowledges a notification, the system stops sending notifications to other users in the contact group.