Add or Edit an AND Filter Group for Pipeline Records
An AND filter group is a named set of one or more filters that affect the data output in the Edit ROW Detail grid. Adding an AND filter group produces a subset of records that meet all filter conditions. PCS processes filters in a filter group in descending order beginning with the filter at the top of the filter group.
These instructions start with the assumption that a PCS module is already selected and the correct pipeline segments have been selected. For information detailing how to select pipeline segments, refer to Select ROWs.
Complete the following steps to create or edit an AND filter for use on the Edit ROW Detail window:
Refer to Apply or Remove a Filter Group for Pipeline Records for information on how to apply a filter.
-
Click Data Entry > Edit ROW Detail to open the Edit ROW Detail window.
-
Select the grid you want to work with by clicking the Information tab or the Maintenance tab.
-
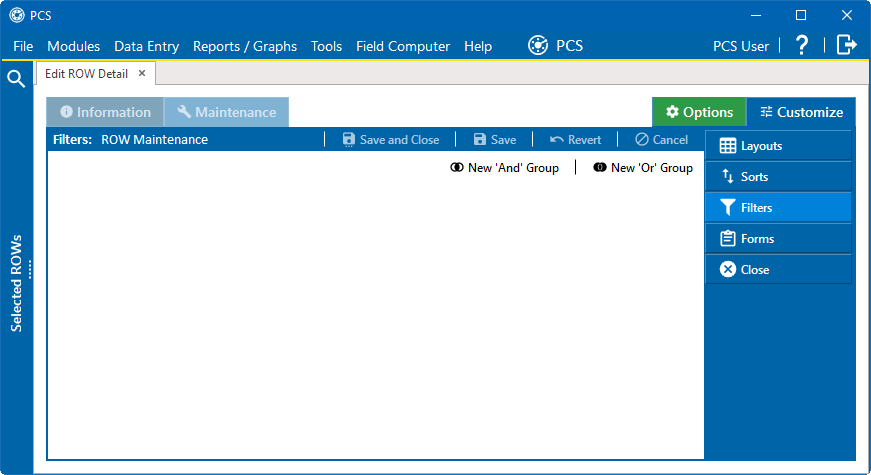
Click the Customize tab and then the Filters tab to open the Filters window.

Filters Window
-
To add a new 'And' filter group, click
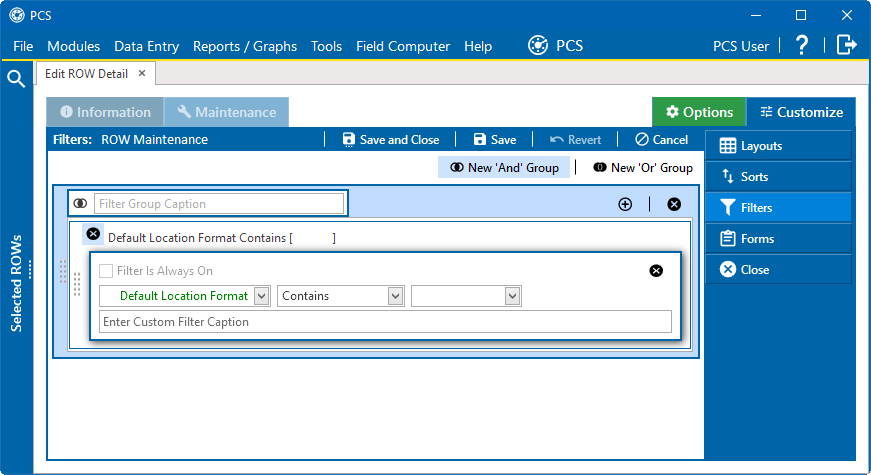
 New 'And' Group to open the filter properties group box.

New 'And' Group Filter
-
Type a name for the filter group in the Filter Group Caption field.
-
If you want the filter to always remain on, select the Filter is Always On check box.
It is recommended that you add filters in the order in which you would like them used.
-
Use filter selection fields to set up filter criteria for the new filter. Select a PCS field, operator, and one or more filter conditions. Filter conditions are based on the PCS field selected. The line above the filter selection updates to show how the filter is defined. For example, shown below is a filter based on Default Location Format. The field and conditions are also shown in the space above the box.

'And' Filter Operators
The line above the box will update as you add or change conditions.

'And' Filter With Conditions
-
If desired, type a name for the filter in the Enter Custom Filter Caption field. The line above the filter box will update with this name.

Custom Filter Caption Name Update
-
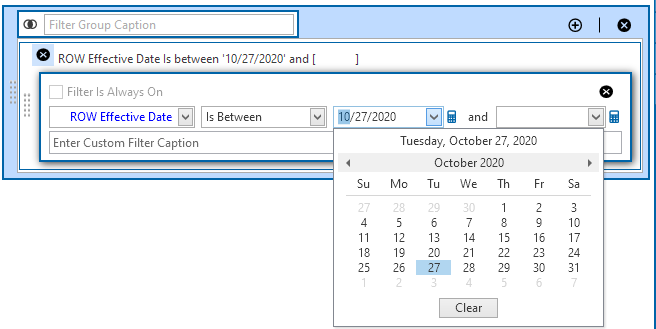
For fields that include a date (such as ROW Effective Date), click the down arrow in the start date field to open a calendar and select a date. You can also type a date in the start and end date fields. Enter a start and end date using the format M/DD/YYYY to indicate the month, day, and year. Repeat this step for the end date field.

Date Filter Start Date
-
To set a date range using dynamic start and end dates, click the
 icon in the start date field and set up dynamic date properties. Repeat this step for the end date field. Clicking the
  icon opens and closes dynamic date property fields.
-
To close a filter box, click the
 icon in the upper left corner.
Close a Filter Box
-
To delete a filter, click the
 icon on the right side of the filter box.
 -
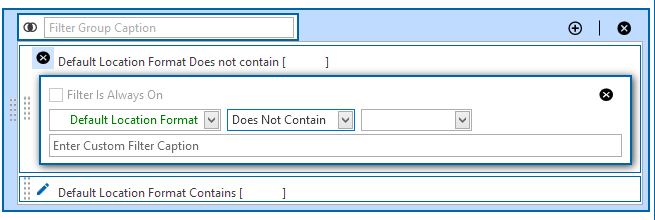
If additional filters are needed within the filter group, click
 to add a new filter box and repeat these steps.
 It is recommended that you add filters in the order in which you would like them used.

Edit Icon with New Filter Group
-
Click the
 icon for a filter to open that filter's property settings and change settings as needed.
-
Click
 Save to save the filter(s).
Add or edit filters as desired.
 -
When finished, click
 Save and Close to save filter(s) and close the window.
Refer to Apply or Remove a Filter Group for Pipeline Records for more information on how to apply a filter group to a data grid.