Send a Facility Survey
You can send a facility survey to the Allegro field computer, mobile device, or a folder on your computer. The survey file includes facilities for inspection based on selected pipeline segments in the Select ROWs window.
The facility survey can be based on any of the following:
-
Selected ROWs — the survey file includes facilities for inspection based on selected pipeline segments in the Select ROWs window.
-
Route — the facilities included in the survey are those that are included in a custom Route. Note that all facilities are included in the survey that pertain to a route regardless of what ROWs are selected in the hierarchy. A route needs to be created in Define Routes window (Data Entry>Define Routes) before it can be used to send a facility survey. Refer to Routes for additional information.
-
Schedule — the survey file includes facilities based on a defined schedule. Can also include open maintenance items if the Include Open Maintenance box is checked.
-
Import Exported List — based on a survey file that was previously exported and then altered by third party software. This feature can be enabled by administrators in PCS. To enable the feature, go to Tools > Options > Field Computer and check Enable Import Exported List
Use the following procedure when you plan to take inspection readings using the Periodic Survey software on the Allegro or mobile device, or if you plan to use the survey file with a third party application.
Complete the following steps to send a facility survey:
-
If you intend to send the survey file to a field computer or mobile device, verify the device is connected to your computer. Refer to the device's user guide for information about how to connect to the device.
-
Click Field Computer > Send to open the Field Computer Send window.

Field Computer Send
-
Select which option the survey file will the based on: Selected ROWs, Route, Schedule, or Import Exported List.
Click the
 toggle button in the
  information bar to view important information related to required settings.
Based on Options
-
For Selected ROWs, select either a facility type theme from the drop-down list or select/deselect the facility types you want from the group panes on the right.
Ad Hoc Theme is automatically selected when you select or deselect individual facility types.
Only public facility type themes are available for selection from the drop-down lists. If you would like to use a private theme, your company's system administrator must make your private theme a public one.

Facility Type Drop-down List
If using Ad Hoc Theme, click the check box for each facility type you want to view in the grid, or click the
 Select All button to select all facility types.
Ad Hoc Theme Radio Button
An Ad Hoc Theme only applies to the current session and is not saved. A facility type is selected when a check mark appears inside the check box. To clear the check mark, click the check box again.
-
For Route, select a Route from the drop-down list. If you don't see the desired route, make sure you have at least one ROW Code selected that has facilities contained in the route.

Field Computer Send - Route
-
For Schedule, select a schedule definition from the drop-down list.

Field Computer Send - Schedule
-
Select Start Date and End Date using the format MM/DD/YYYY to indicate the month, day, and year.
-
For a dynamic date range, click the
 icon to expand the fields. Select a Start Date from the drop-down list, enter an offset value in the second field, and select the time period from the third field's drop-down list. Click the
  to close. If desired, repeat for the End Date.
Dynamic Dates Start Date Drop-down
-
-
-
For Import Exported List, click the … icon in the Import Exported List field to display the Open window. Navigate to the altered survey file and select it. Click Open to close the window and return to the Field Computer Send window.
-
-
In the View pane, select a prompt, layout, and sorting theme:

View Pane
For Import Exported List, only the Select Prompt Theme field is available.
-
Click the down arrow in Select Prompt Theme and select a prompt theme in the selection list.
-
Click the down arrow in Select Layout Theme and select a layout theme in the selection list.
-
If available, click the down arrow in Select Sort Theme and select a sorting theme in the selection list. The Select Sort Theme option may not be available if Selectable Sorting themes were pre-selected as part of the Prompt.
-
For Scheduled option, also select a Sort Dates option - Oldest First or Newest First.

Scheduled Option Sort Dates
-
-
Choose the type of survey to be sent to FDC
-
Only Inspections- blank inspection fields only
-
Inspections and Open Maintenance - includes both inspection fields and open maintenance items
-
Only Open Maintenance - A filtered list of only facilities with open maintenance items
-
-
If the Predefined Repair Codes check box is available for selection, click the check box to pre-populate a repair code in the maintenance repair code field.
This option is only available when the repair code for the facility is a picklist (refer to Edit a Standard or Dynamic Picklist), and the facility repair code prompt is included in the currently selected prompt theme.
-
Click
 Apply to update the grid.
 -
In the Options pane, complete the following selections:
Some options settings will persist during page navigation. Based On Mode, Facility Type Selection/Route Selection, Send Method, Previous Reading Count, Open Maintenance selection, permanent filters, Output File name, Predefined repair code selection, and Ad Hoc filters will persist when navigating to the Customize tab and back.
Based On Mode, Send Method, Previous Reading Count, and permanent filters will persist when closing the FDC Send page entirely, but other options will reset to default.

Options Pane
-
Type a name in the Output File field if you want to rename the file.
-
Select one of the options for where to send the file:
-
Send to Survey Manager - for sending facility surveys to (Undefined variable: productsInfo_ai/cn/sm.softwareName) using PCS Wirelessly Sync. Existing configurations and customizations can be used when sending survey data to Survey Manager.
The Send to Survey Manager option will not appear if no token is configured in the Integration pane under Options. Refer to Set Integration Options for details.
-
Send to FDC - for sending facility survey data directly to Mesa 3 and Allegro AX field computers running the PCSField Data Collector app.
-
Send FDC to Disk - for file-based transfers of facility survey data to Mesa 3 and Allegro AX field computers running the PCSField Data Collector app.
PCSField Data Collector file formats can be exported directly without use of a transformation tool.
-
Send to Allegro - for sending facility survey data directly to Allegro QX field computers.
-
Send Allegro to Disk - for file-based transfers of facility survey data to Allegro QX field computers.
-
-
To include historical readings for each selected facility, enter the number of readings to include in the Previous Reading Count field. To not include any historical readings, enter 0. The maximum amount of readings that can be entered here is defined in Options. Refer to Set Field Computer Options for more information about the maximum number of readings.
These readings are stored in a .hst file that is included in the .dat file.
-
If the Predefined Repair Codes check box is available for selection, click the check box to pre-populate a repair code in the maintenance repair code field. This option is only available when the repair code for the facility is a picklist (refer to Edit a Standard or Dynamic Picklist), and the facility repair code prompt is included in the currently selected prompt theme.
-
For the Send to Allegro Disk and Send to Mobile Disk options, enter the output directory location in the Output Directory field or search for the directory using the ... ellipses button to locate the directory.
-
For Send to FDC options (for mobile devices such as the Allegro AX or Mesa 3), select an Output Device from the drop-down list.
Refer to the following Allegro or mobile device user guides for more information on using these devices:
-
PCS Field Data Collector Support Site for the Allegro AX and Mesa 3.
-
-
OPTIONAL: If you want to work with a subset of facility records that meet certain filter conditions, complete the following steps:
-
Click
 Filters to open the Filters pane.
Filters Pane
-
Click
 (add) to open the filter properties group box.
Filter Criteria
-
Select a PCS field, operator, and filter condition(s) using filter selection fields.
-
To add additional filters, click
to add another row of filter selection fields. Select a PCS field, operator, and filter condition(s) to set up filter criteria. -
Repeat as needed.
-
You can also add 'And' and 'Or' filters to the list of filter. Refer to Work with Themes and Filter Groups for more details about these types of filters.
-
When finished, click
Filters to close the Filters pane.The filters are used only for the current session. If you close and return to this window, the filters will not be set. To save any filter settings, you will need to customize the setup in the Customize window.
-
-
Click
Apply to update the grid. -
Click
 Send. Based on your selection earlier, the survey file is sent to the specified location. If the Send to Survey Manager option is selected, a progress window is displayed.
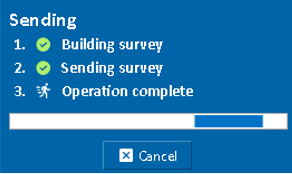
Send to Survey Manager Progress Window
-
When a message displays confirming the send process is complete, click
 OK to close the message.
If you selected to send the survey file to a field computer or mobile device, PCS sends the survey file to the PSData folder on the device.

Send Process Complete
Facility survey data sent to Survey Manager must be imported into (Undefined variable: productsInfo_ai/cn/sm.softwareName). Refer to Import Facility Survey Data for details.