Work with Graph Style Reports
These instructions start with the assumption that the correct pipeline segments have been selected. For information detailing how to select pipeline segments, refer to Select ROWs.
Complete the following steps to set up and print or export a graph style report:
-
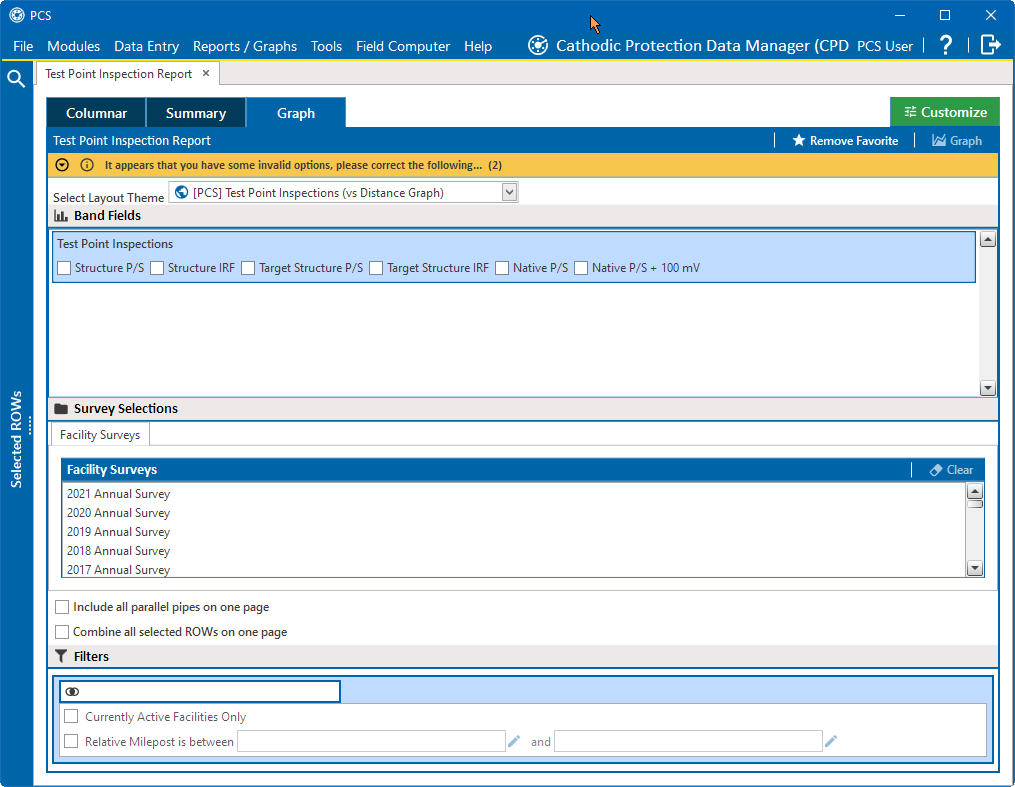
Click Reports/Graphs and then select a report in a columnar style from the menu to open a window with the report's property settings. For example, (in the CPDM module) Report/Graphs > Test Point Reports > Test Point Inspection Report. Click the Graph tab to see the options for this report.

Test Point Inspection Report - Graph Report
-
Select a layout theme from the Select Layout Theme drop-down list. The layout theme determines which fields are included in the report.
Only public themes are available for selection. If you would like to use a private theme, your company's system administrator must make your private theme a public one.
-
In the Band Fields pane, click the check box for more or more types of survey data you want to include in the graph.
-
In the Survey Selections pane, select one or more Facility Surveys. To select facility surveys in sequential order, press Shift and then click each survey. To select facility survey in non-sequential order, press Ctrl and then click each survey.
-
To include all parallel pipelines on one page, select the Include all parallel pipes on one pagecheck box.
-
To show all selected pipelines on a single page, select the Combine all selected ROWs on one page check box.
-
Select additional filters in the Filters pane as required.
-
If you want to add the report in Favorite Reports (Reports/Graphs > Favorite Reports), click
 Add Favorite. To remove it from the list, click
  Remove Favorite.
 -
To view the graph, click
 Graph to open the graph in a preview window. Then click the
  Print button to print the graph.