Add Rectifier Anode Inspections
If rectifier anode records have not yet been added in the Rectifier Anode Information mini-grid, complete the procedure in the previous section first (Add Rectifier Anode Information) and then continue with the procedure in this section.
Complete the following steps to enter anode inspection readings in the Rectifier Anode Inspection mini-grid:
-
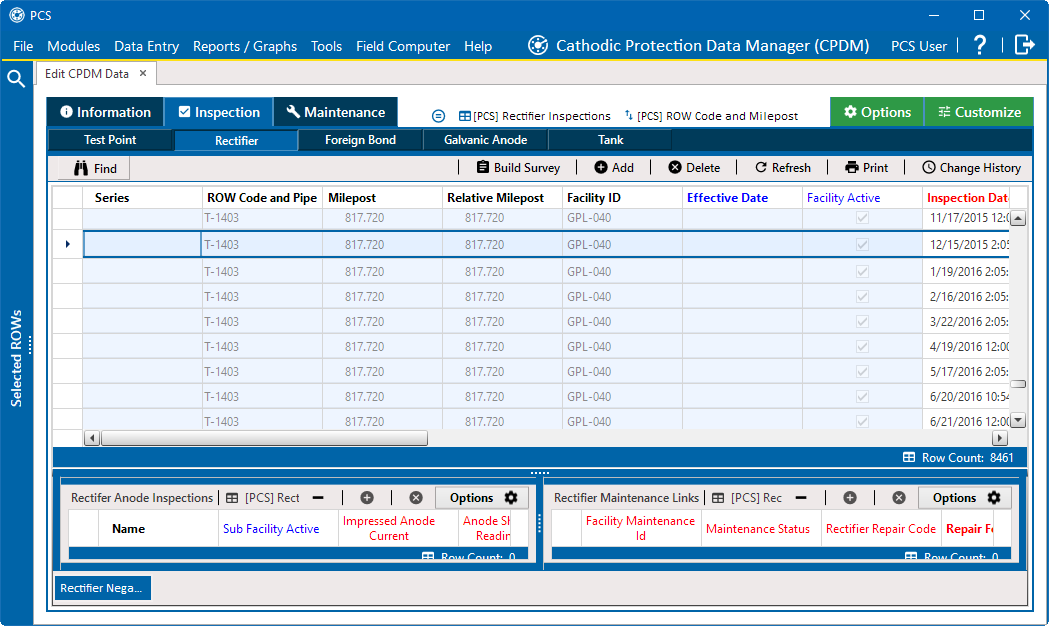
In the module's data grid, click the Inspection tab and then the Rectifier tab.
-
Select a row of records with the rectifier and anodes you want to add anode inspection readings.

Rectifier Inspection Grid
-
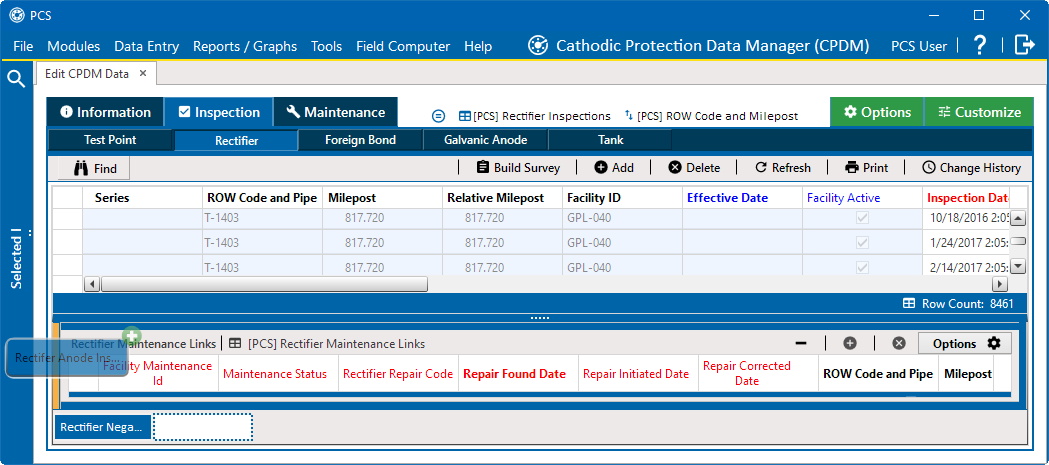
If the Rectifier Anode Inspection mini-grid is not visible, click and drag the Rectifier Anode Inspection button at the bottom of the window to the mini-grid area.
The example below shows the Rectifier Anode Inspection mini-grid being added to the left of an existing mini-grid in the mini-grid area. Your setup may be different and include none or more than one mini-grids. To replace a mini-grid, move the button over an existing one. To add a mini-grid next to any other mini-grid in the area, move the button to the left or right of the existing one. The border turns orange to show where the mini-grid will be placed.

Adding a Mini-grid to Mini-grid Area
-
Select an anode in the Rectifier Anode Inspections mini-grid.

Rectifier Information Mini-grid
-
Type an inspection reading in either the Impressed Anode Current or Anode Shunt Reading field.
-
Click
 Refresh to update
  derived fields, such as Number of Impressed Anodes.
For more information about
 derived fields, refer to Work with Derived Fields.
 -
Repeat these steps to enter inspection readings for remaining anodes.