Add a Pipeline in the Hierarchy
The process for adding a pipeline to the hierarchy is the same as for adding a folder, except you select a folder in the hierarchy where you want to add the pipeline instead of a level.
Complete the following steps to add a pipeline in the hierarchy:
-
Click the
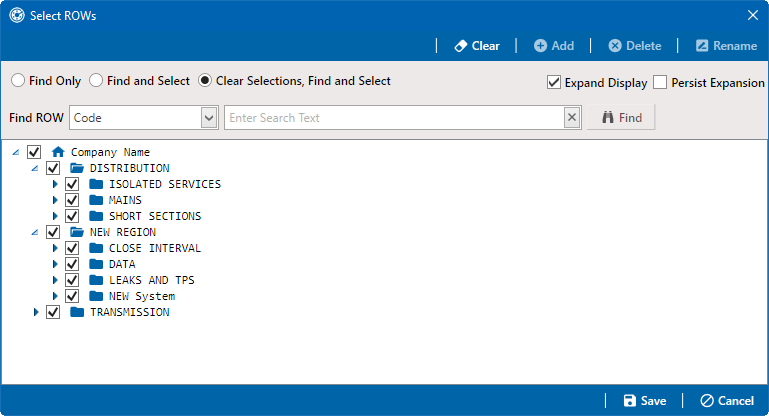
 icon on the Select ROWs title bar (or double-click in the pane or select File > Select ROWs) to open the Select ROWs window.
Selected ROWs Window
-
Select a folder in the hierarchy you want to add a pipeline.

Selected Folder for New Pipeline
-
Click
 Add to open the Add New Node window.
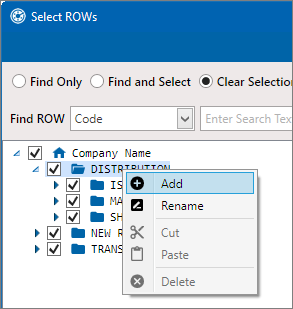
 You can also open the Add New Node window by right-clicking a selection in the hierarchy tree and selecting
 Add in the shortcut menu.
Shortcut menu

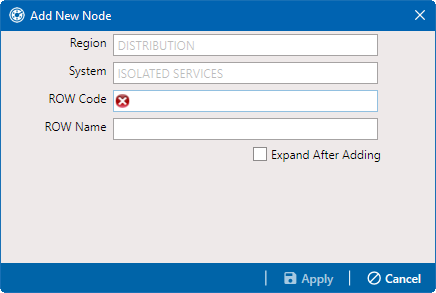
Add New Node
-
Enter a pipeline code for the new pipeline in the ROW Code field. Fields requiring information include a
 red icon, such as ROW Code.
The names of hierarchy folders, as well as ROW Code and ROW Name fields, support up to 100 characters.
-
Type a name for the pipeline in the ROW Name field.
-
Click the option Expand After Adding if you want to expand the selection tree after clicking Apply.
-
Click
 Apply. Repeat these steps as needed to add another pipeline in a selected hierarchy folder.
For information about setting this required field for all pipelines in the system, refer to with Understanding Default Location Formats