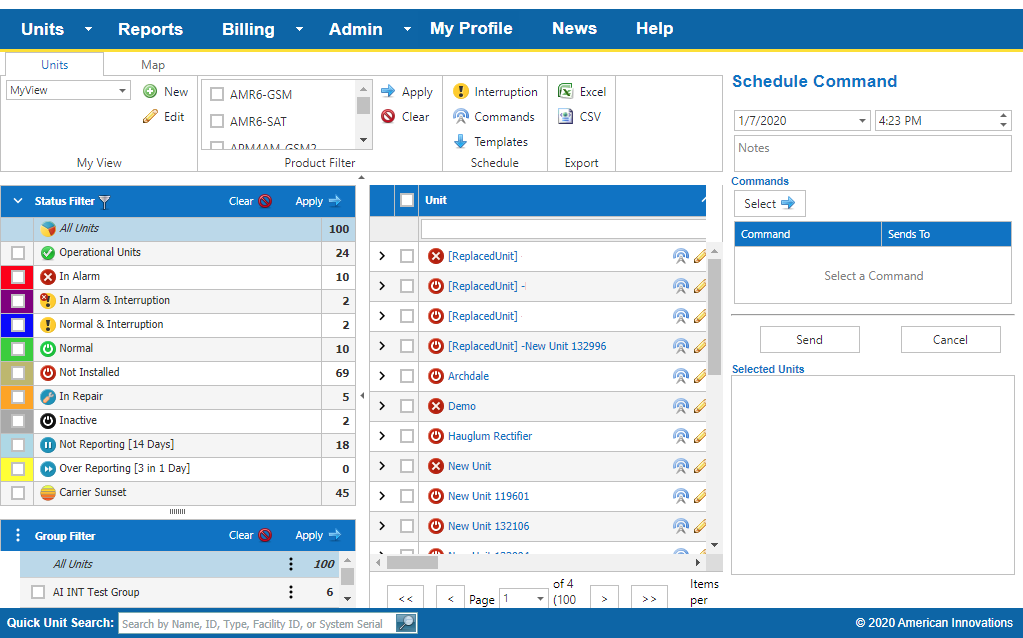
Send Command to Multiple Units
For additional information on scheduling, sending, or canceling commands, see Send Commands Page.
Complete the following steps to send commands to more than one unit from either the Units or Map tab on the All Units page:
-
Click
 Commands on the Ribbon.
The Units pane updates the display with only units that can receive a command. The display is also dependent on which Status or Group filter is selected.
-
In the Schedule Command pane, select date and time in the first two fields.

Schedule Command
-
Enter any notes for the scheduled command in the Notes text field.
-
Click Select
 and then select the name of the command to send from the list.
The commands are listed along with the unit types that can receive them. After selecting a command, the Units pane updates with only the units that can receive the selected command.
-
Select the units from the Units pane. The units will display in the Selected Units box after selected:
-
Select individual units from the Units pane by clicking the check box next to the unit name; or select all units shown in the Units pane by clicking the check box in the header.
You can display only units from a Unit Group by selecting the Unit Group from the Group Filter pane and then click Apply
 .
.
-
Remove units from the Selected Units box by unchecking the check box next to the unit name in the Units pane.
If the name of the unit displays with a
 warning icon, the unit is in a
  Not Installed status and may not be set up to receive commands.
-
-
Click Send to send the command or Cancel to cancel the command schedule and close the Schedule Command pane.