Install the Battery Pack
The battery compartment is located on the back of the Mesa 3. After installing the battery, charge the battery pack until completely full (about 6 hours).
Refer to the Juniper Quick Start Guide for the Mesa 3 that is included in the shipping box for instructions on installing the battery.
Improper battery use may result in a fire, explosion or other hazard. Refer to the Mesa 3 Owner's Manual by Juniper Systems, Inc. for additional battery handling information.
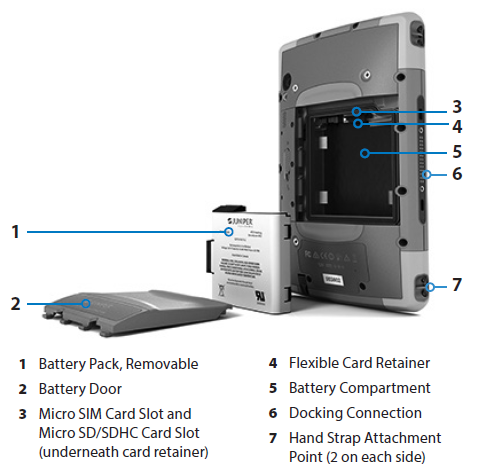
Mesa 3 Battery Compartment
Complete the following steps to install and charge the battery pack:
-
Slide the lock slider to the open position.
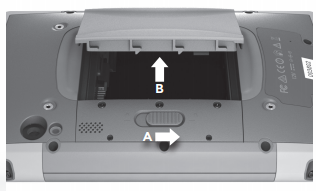
Lock Slider and Battery Door
-
If you are using a micro SD card for additional memory, you can install it now before you install the battery pack. Refer to Install and Format an SD Card In the Mesa 3 for additional instructions.
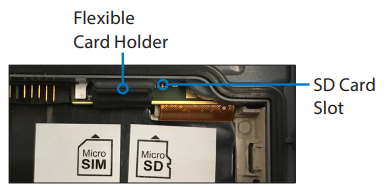
Mesa 3 SD Card Slot
-
Place the battery pack in the compartment. Follow the graphic on the battery label to insert the battery pack properly.
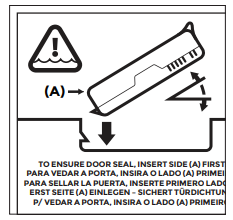
Battery Graphic
Hold the battery so that the black tab on the front edge of the battery is up and facing the door latch (this tab helps you pull the battery out). Place the back edge in first, gently pushing it underneath the two battery catches. Rotate the front edge down until it is in position.
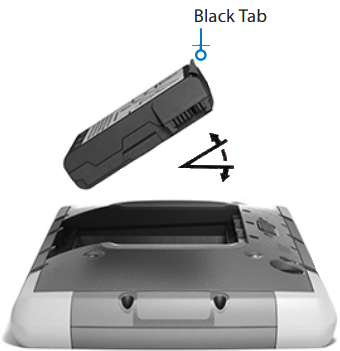
Battery Installed
Do not insert the battery pack straight down. Damage to the unit could occur.
-
Replace the door and press down on it until the latch pops into the locked position.

Closed and Locked Battery Door
-
Plug the AC wall power charger that came with the tablet into a wall socket. Plug the other end into the DC power jack on the side of the Mesa 3.
-
Charge the battery pack at room temperature (68°F or 20°C) for 6 hours (for the first charge). While the battery pack is charging, the red LED blinks. When it is fully charged and external power is applied, the red LED is solid.