Set Measurement Type, Voltage Range, and DVM Settings
Before beginning a survey, set up the measurement type, voltage range, and DVM settings, which include the Method and GPS settings.
Refer to View the DVM Graph for details on how the DVM settings affect the graph and waveform.
Complete the following steps to select the DVM settings:
-
Open the PCS Field Data Collector app.
-
Tap DVM.
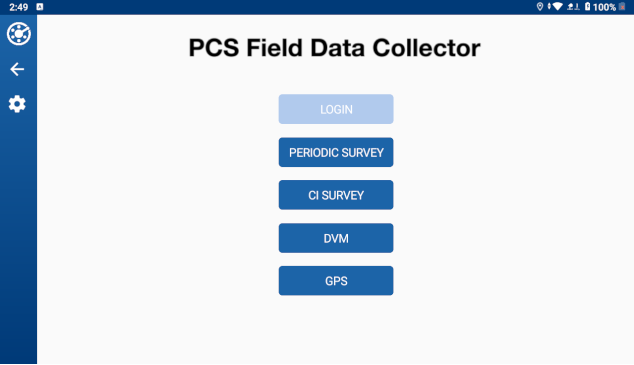
Main Window
-
Choose a measurement type by tapping one of the following buttons at the bottom of the window: VDC, VAC, DC Amps, or AC Amps.
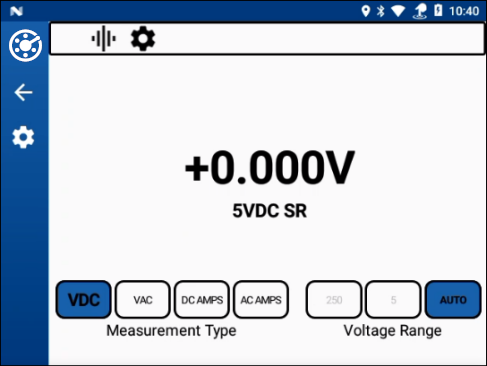
Measurement Type Options
-
Set the voltage range either manually by tapping one of the Voltage Range buttons or tapping Auto to use autoranging instead.
-
To set additional settings, tap
 Settings.
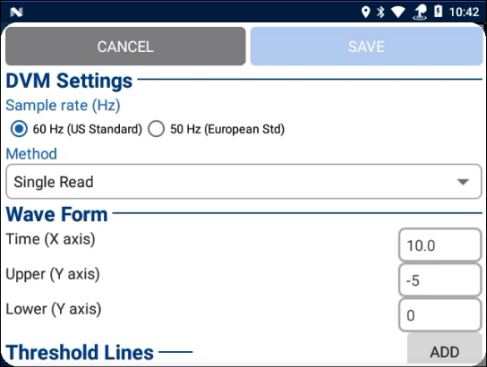
DVM Settings
-
Select a sample rate - either 60 Hz (US Standard) or 50 Hz (European Std).
-
In the Method drop-down list, select a read method from the available selections: Single Read, GPS Sync, GPS Real-Time, or High/Low. Scroll through the list to find the method you desire.
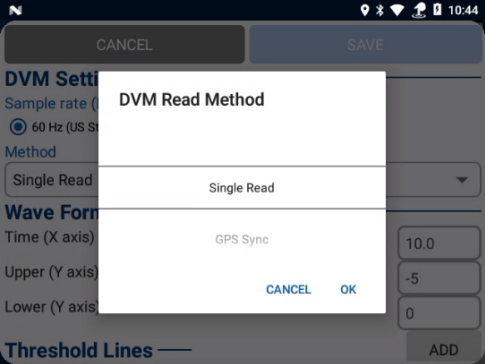
DVM Read Method
-
For all methods, set values for Time (X axis), Upper (Y axis), and Lower (Y axis) in the Wave Form section.

Wave Form Settings
-
OPTIONAL: For all methods, set a value for a threshold line and a color for the line from the drop-down list in the Threshold Lines section.

Threshold Lines
-
To add another threshold line, tap the Add button.
-
To delete a threshold line, tap the Delete button next to the line's value.
-
-
For GPS Sync, set Cycle Time and GPS Sync Settings:
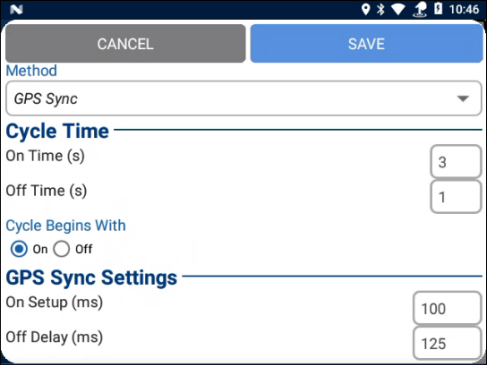
GPS Sync Settings
-
Cycle Time — enter a value for the On Time (in seconds) and Off Time (in seconds).
-
Cycle Begins With — select either the On or Off radio button to select how the cycle will begin.
-
GPS Sync Settings — enter values for On Setup (in milliseconds) and Off Delay (in milliseconds).
If you enter an invalid value, a
 icon will display next to the field.
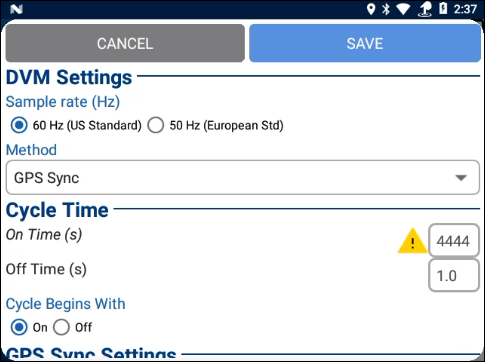
Invalid Entry Warning
-
-
For GPS Real-Time, set Cycle Time and GPS RT Settings:
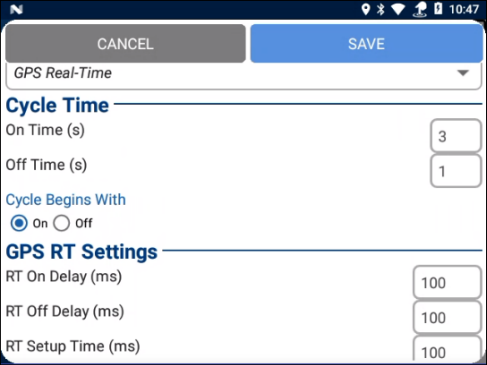
GPS Real-Time Settings
-
Cycle Time — enter a value for the On Time (in seconds) and Off Time (in seconds).
-
GPS RT Settings — Enter values for the RT On Delay, RT Off Delay, and RT Setup Time (in milliseconds).
-
-
For High/Low, set Cycle Time and HiLo Settings:
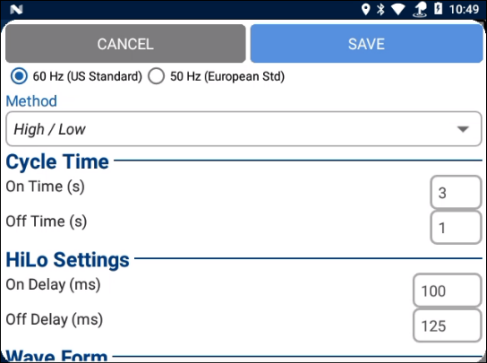
High/Low Settings
-
Cycle Time — enter a value for the On Time (in seconds) and Off Time (in seconds).
-
HiLo Settings — Enter values for the On Delay and Off Delay (in milliseconds).
-
-
Tap Save to save settings and return to the main DVM window.