Create an External Bridge Definition
Complete the following steps to create an Export to Table Bridge definition:
-
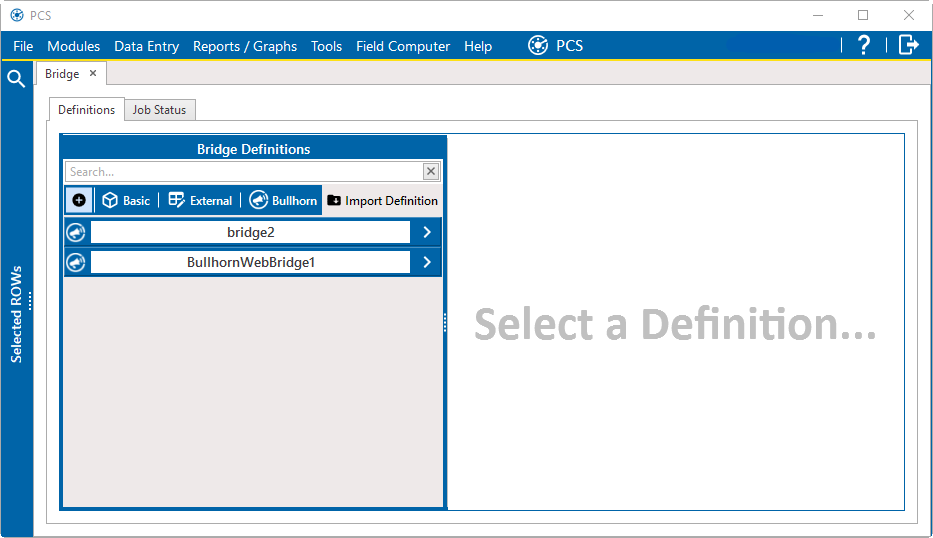
Navigate to Tools > Bridge. Click External in the Bridge Definitions pane.

Export to Table Bridge Definition
-
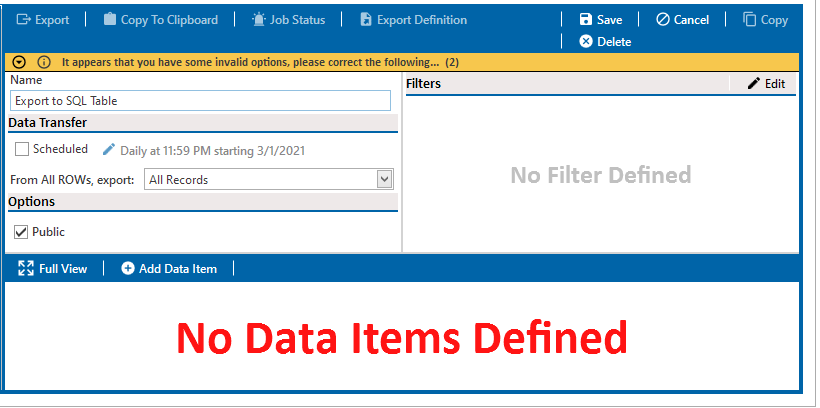
Enter a name for the definition in the Name field. This can distinguish the reason for the export if you have multiple export definitions.
-
Under Options, select Public to make the definition public. Leave the check box cleared if you want the definition to be private.

Bridge Definitions Pane
-
Click Add Data Item to define External Bridge settings. Configure the bridge definition based on what data you want.

Field type selection
Filters are also available similar to the data grid can be added as well. Refer to Set Filters for All or Selected Data Items for more information
-
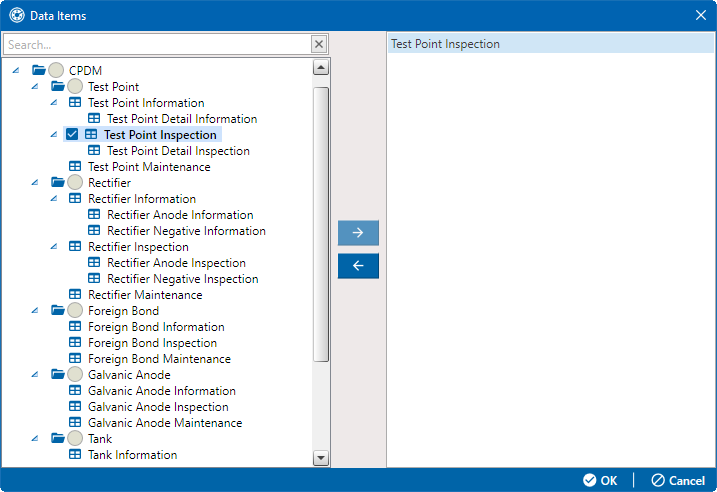
The right pane of the Data Items window lists all selected data items for import or export. To remove a data item, select it and then click the
 button to move it back to the left pane. You can also double-click an item to move it.
 -
Click Ok when you have completed selecting data items.
-
In the Definitions pane, click
 Save.
Save.
-
Map the Fields
Once you have your data items selected, select and map the fields from each data item you want to be exported to the SQL tables. You will notice that each data item is selectable to have fields mapped in it. Complete the following steps to map the fields:
-
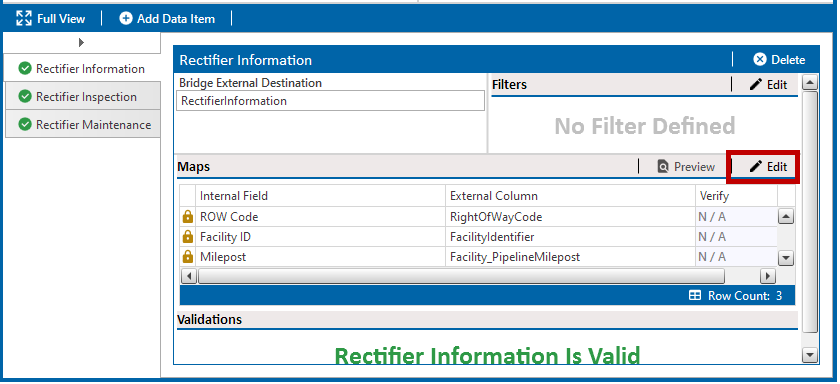
Click the Edit button in the Maps pane to access the field mappings for the data item.

Edit to Access Field Mapping
-
Internal fields are shown in the Internal Fields pane. You can select any of these to be added to the Export Database. The process of adding data fields is similar to the bridge export method (Define Data Items for Basic Bridge Definition). Add the fields you want to populate to the Mappings pane by double-clicking the data field in the Internal Fields pane. You can also remove data fields from the Mappings pane by double-clicking on the fields.

Field Mappings
Data fields with the
 icon are required in the export.
-
If you have multiple data items, you will have to do multiple mappings. Figure 4 shows the mapping for Test Point Inspections and Figure 5 shows the mapping for Rectifier Inspections.

Rectifier Field Mapping
-
Click
 OK when you have completed each field mapping.
 -
In the Definitions pane, click
 Save.
Save.
Configure the Schedule
After you complete field mapping, you have the option to schedule the export automatically. The schedule is activated by selecting the Scheduled check box. Click the ![]() icon next to the displayed schedule to open a schedule configuration window.
icon next to the displayed schedule to open a schedule configuration window.

Schedule Configuration
Refer to Set Basic Bridge Definition Properties for more information about how to schedule the Bridge definition.
If you don’t need to have the export on a schedule, click the ![]() Export button to manually run the bridge. Be sure to check if PCS Job Services is running correctly.
Export button to manually run the bridge. Be sure to check if PCS Job Services is running correctly.
Was this topic useful? Please email your feedback to us at content@aiworldwide.com.