Add an On/Off Pair User Defined Field
PCS provides several pairs of installed on/off fields for recording inspection readings in a data grid or form, including the following:
-
AC P/S and AC IRF
-
Casing P/S and Casing IRF
-
Foreign P/S and Foreign IRF
-
Insulator P/S and Insulator IRF
-
Structure P/S and Structure IRF
If PCS does not provide an installed pair of on/off fields you can use to record inspection readings for a test point facility, you can create a custom On/Off Pair user defined field (UDF).
Complete the following steps to create an On/Off Pair UDF:
-
Click Tools > Field and UDF Customizations to open the Field and UDF Customizations window.
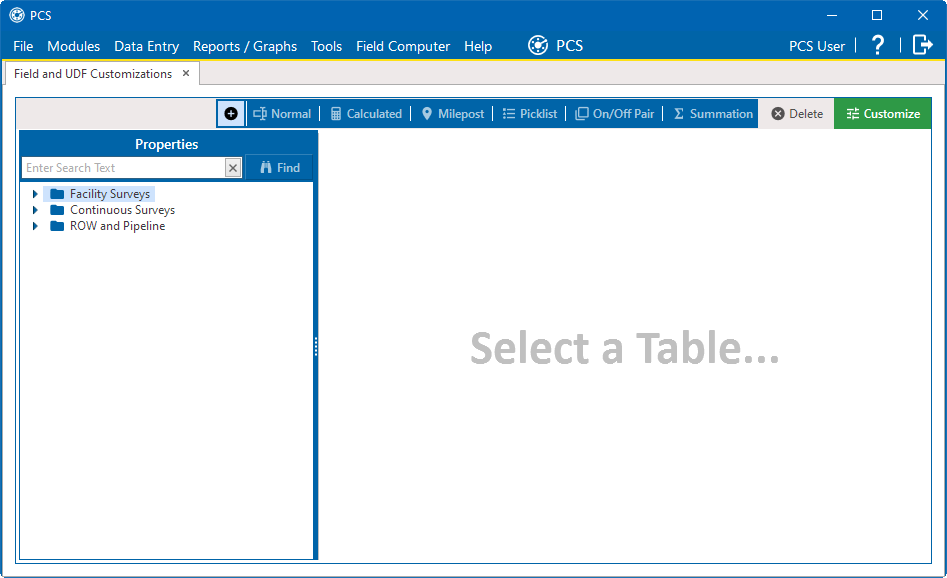
Field and UDF Customization Window
-
If you want to select a grid layout theme, click
 Customize to open the Column Selections window, select a theme from the Select a Layout Theme field, and click
  Save.
Save.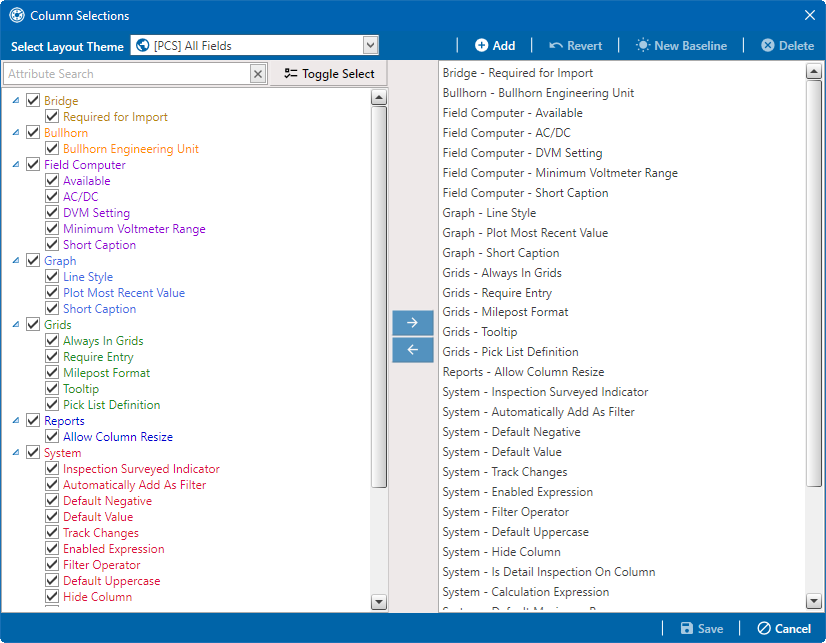
Column Selections Window
-
Select a table in the Properties pane that includes the data entry grid to which you want to add a UDF.
Click the Properties header bar to collapse the Properties pane to expand the view of the grid. Click the bar again to expand the Properties pane.
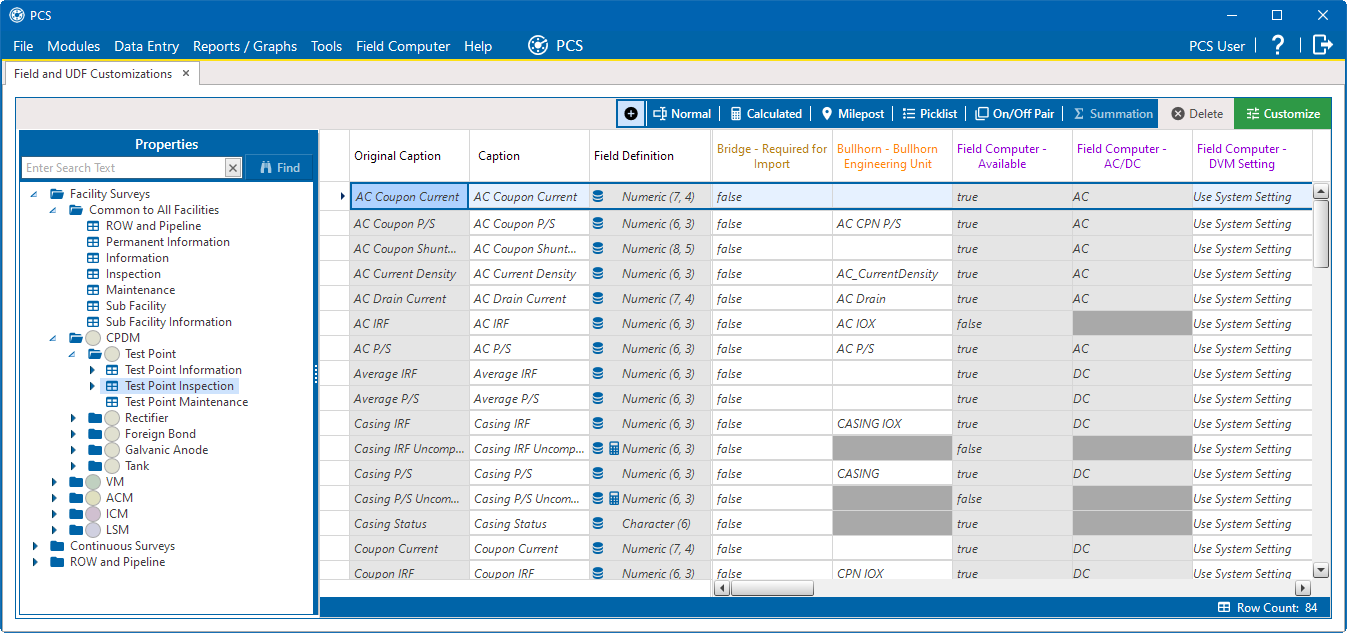
Field and UDF Customizations
-
Click
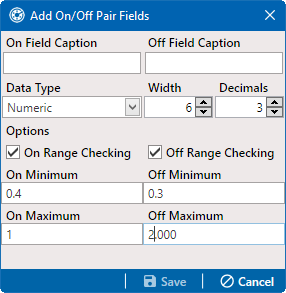
 On/Off Pair in the toolbar to open the Add On/Off Pair Fields window .
Add On/Off Pair Fields
-
Type a unique name in the On Field Caption and Off Field Caption fields .
-
Select a data type from the Data Type drop-down field.
A Numeric data type is a positive or negative value with decimal precision, such as 1.123 and –1.123. An Integer data type is a positive or negative whole number, such as 5 and –5.
-
If you selected the Numeric data type, set the length of the field using the Width and Decimal fields.
Clicking the up arrow in Width or Decimal fields increases the value; clicking the down arrow decreases the value.
-
If you want PCS to apply Range Checking to the On reading in the On/Off Pair, complete the following steps:
Range checking is the acceptable range of values allowed for data entry in an inspection field.
Setting up range checking allows PCS to alert the user when an incorrect value has been entered in an inspection field. For example, if the acceptable range of values is in a range of -10 to 0 and the user enters a value that is outside this range, a warning displays allowing the user to correct the invalid entry. Data entry errors are less likely to occur when using Range Checking. For more information, see Set Up Range Checking for Inspection Fields.
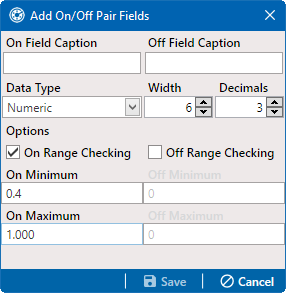
On Range Checking
-
Click the On Range Checking check box.
-
Type a minimum range value in the On Minimum field.
-
Type a maximum range value in the On Maximum field.
-
-
If you want PCS to apply Range Checking to the Off reading in the On/Off Pair, complete the following steps:
Off Range Checking
-
Click the Off Range Checking check box.
-
Type a minimum range value in the Off Minimum field.
-
Type a maximum range value in the Off Maximum field.
-
-
When finished with configuring the On/Off Pair, click
 Save.
Save.
The On/Off Pair UDF is now available for adding in a data entry grid. If needed, refer to Themes and Filter Groups for information about how to add fields in a data grid or form.