Configure or Edit an Email Report
After creating a new email report, set the properties for it. After saving the report, the report can be editing using the instructions in this topic.
After you create a new email report, the options for the report display in the Email Reports tab of the Email Notification window.
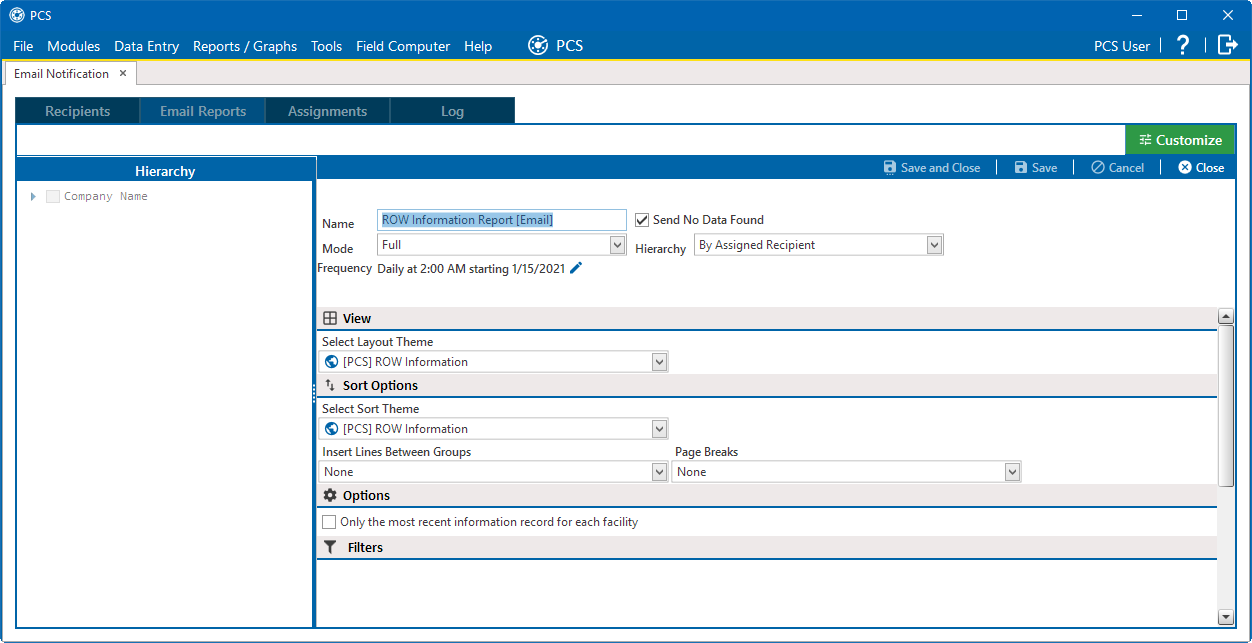
Email Report Options
Complete the following steps to configure or edit an email report:
-
Enter a new name for the email report in the Name field, if desired. The email report name will be used as the subject line for created emails and the identifier for the report creation job in the Email Notification Log and the Job Service Viewer.
-
Decide How to Handle Empty Reports — select the Send No Data Found check box to send the email reports even when the reports contain no data. Click to clear the Send No Data Found check box to prevent email reports from being sent when the report contains no data.
-
Select one of the following options from the Mode drop-down list to select how much data to include in the report:
-
Select Full to include all unchanged, new, and updated data in the emailed report.
-
Select Incremental to only include data that has changed as a result of changes to intelligent key data. Data in an incremental report would include changes to calculated or derived fields.
-
Select Data Changed Since Last Run to include only data that has changed since the last report was run.
-
Select Data Inserted Since Last Run to include only data that has been added to PCS since the last report was run.
-
-
Select an option from the Hierarchy drop-down list to determine the pipeline segments to include in the report:
-
Select By Assigned Recipient to only include data in the report for those pipeline segments the email recipient has access to, as defined for the recipient in the Recipients tab of the Email Notification window. If Hierarchical Security is turned on in Options, the data in the report is further limited by the pipeline segments defined for the recipient in User Management.
-
Select By Email Report Selection to only include data in the report for the pipeline segments assigned to the email report. To assign pipeline segments to the report, select the check box next to the desired pipeline segment in the in the Hierarchy pane.
If Hierarchical Security is turned on in Options, the data in the report is further limited by the pipeline segments defined for the recipient in User Management.
-
-
Click the
 next to Frequency to set up a schedule.
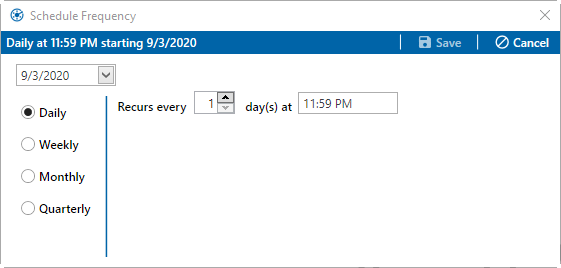
Schedule Frequency Window
-
Decide how often the report should run by selecting one of the following:
-
Daily: Select Daily to run the report after a certain number of days has passed since the report. Enter a number in the Recurs every field and a time in the day(s) at field.
-
Weekly: Select Weekly to run the report on certain days of the week. Enter a number in the field provided to determine how many weeks should pass between imports. Select the check box next to the day(s) of the week that the report should be sent.
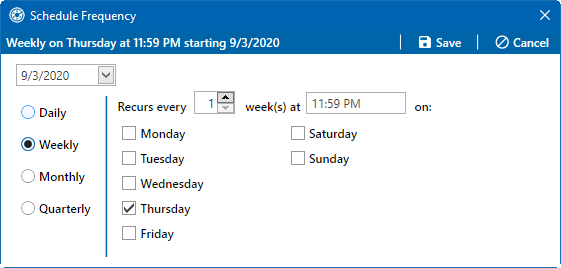
Schedule Frequency - Weekly
-
Monthly: Select Monthly to run the report after a certain number of months has passed since the last run. You can select one of the following schedules:
-
Select the first radio button on the right to run the report only one time during the month. Select the day the report will run in the Day field, the frequency in the of every month(s) field, and enter a time a time in the last text field.
-
Select the second radio button on the right to run the report twice during specified months. Select which days the report will run in the two Day fields. Select the frequency in the of every month(s) field and enter a time a time in the second text field.
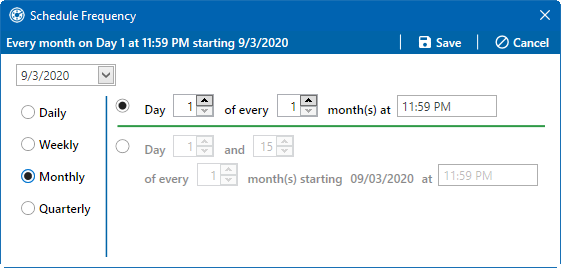
Schedule Frequency - Monthly
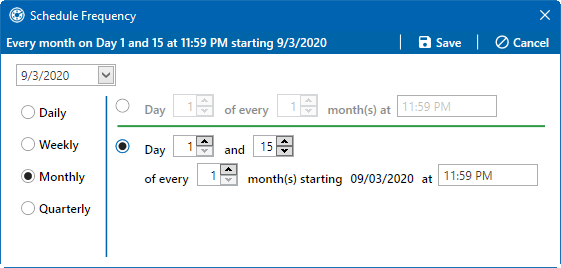
Schedule Frequency - Monthly with Specific Months and Time
-
-
Quarterly: Select Quarterly to run the report on the first day of every quarter. Enter a time in the text field.
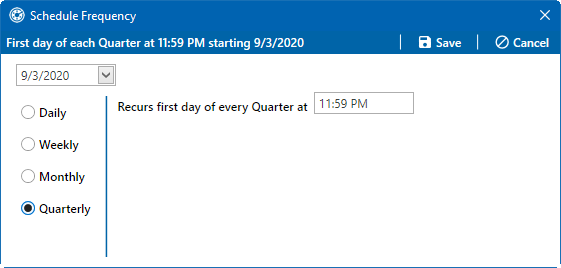
Schedule Frequency - Quarterly
-
Click
 Saveto save schedule.
-
-
-
Select View and Sort Options.
-
Add filters, if necessary. Refer to Add, Edit, and Apply an AND or Or Filter Group for more information.
-
Click
 Save to save all changes to the email report. Click
  Save and Close to return to the list of configured email reports. In order to send an email report to email recipients, a recipient must be assigned to the report. Refer to Manage Email Assignments for more information.