Define Data Items for SDL Imports
You can add data items to the Bridge definition that will be included in the import. Each data item added must also be configured to ensure the fields are mapped correctly, the correct data is exported, and the data is exported to the desired location.
Complete the following steps to add and configure data item(s) for import or export from PCS:
-
Open the Bridge definition for which you would like to add data items.

Basic Bridge Definition for Stationary Survey
-
Click
 Add Data Item to open the Data Items window.
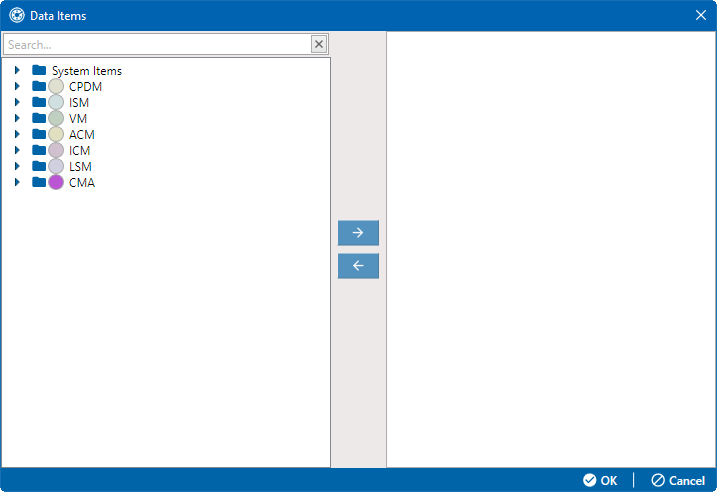
Data Items Window
-
Navigate to the folder(s) containing the Stationary Survey Measurement. Click the
 icon next to a top-level folder to expand it.
 -
Select the data item and click the
 button to move it to the right pane of the window. You can also double-click an item to move it.
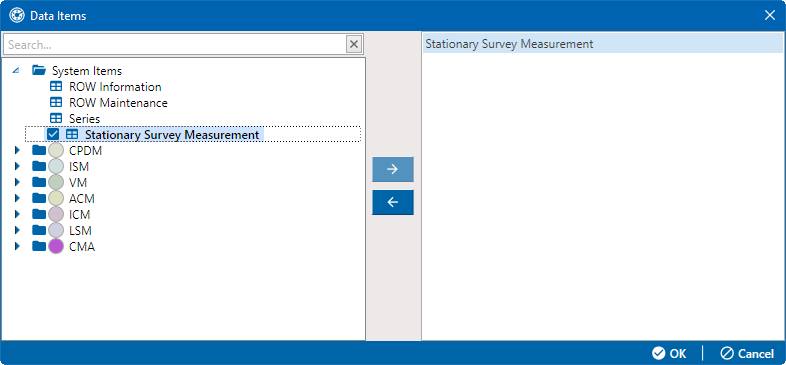
Data Items - Stationary Survey Measurement
-
Click
 OK to close the window and return to the Bridge definition window. The data items are shown on the left side of the lower pane of the Bridge Definition window. You can click
  Full View to view just this area. Click
  Full View again to expand the view.
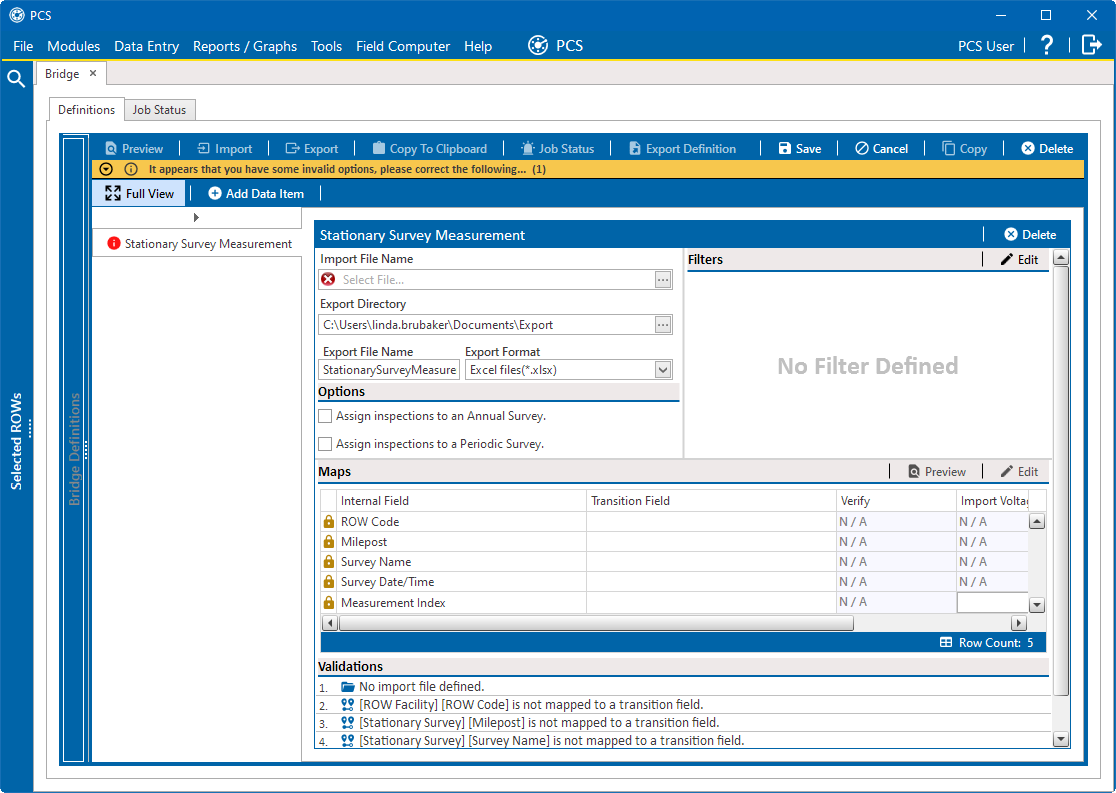
Data Items Pane
-
To assign the SDL survey to a survey folder based on the survey date, complete one or both of the following steps in the Options pane as required:

Data Items Options
-
If you want to assign the SDL survey to an annual survey folder, select the Assign inspections to an Annual Survey check box.
-
If you want to assign the SDL Survey to a periodic survey folder, select the Assign inspections to a Periodic Survey check box.
-
-
To configure the data item added, select the data item and complete the following steps:
-
Click the ellipsis button … in the Import File Name field to open the Import File window.
-
Navigate to a folder on your computer where you want to save the export file.
-
Click Open to close the window and return to the definition window.
-
-
In the Stationary Survey(s) window opens, select the SDL survey file.
A yellow
 Snap To Facility button indicates the SDL survey file is matched to an unregistered milepost location. A green
  Snap To Facility button indicates the SDL survey file has been automatically matched to a milepost location already established in PCS. A blue
  Snap To Facility button indicates a match was not found for the pipeline segment or pipeline Series.
Stationary Survey(s)
-
Click the Snap To Facility button to open the Snap To Facility window.
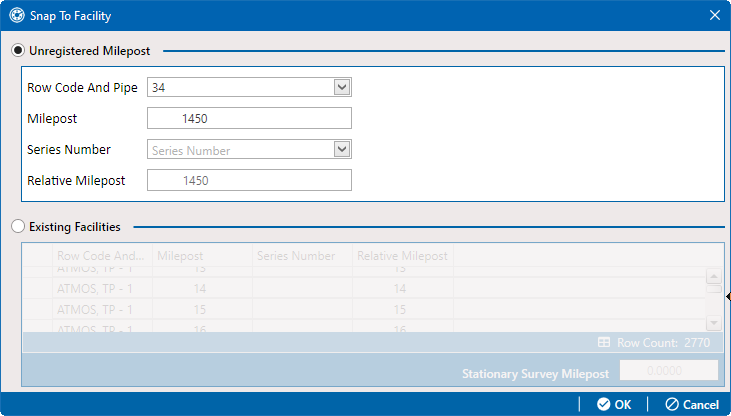
Snap To Facility Window
-
When the milepost location of the SDL survey does not match a pipeline segment already established in PCS, it is identified as an UnRegistered Milepost.
When the milepost location of the SDL survey does match an existing pipeline segment in PCS, use the Snap To Facility window to match the SDL survey to a milepost location on the pipeline segment. This process ensures telluric compensation calculations are accurate.
Complete the following steps match the SDL survey to an existing milepost location:
-
Click Existing Facilities to enable the grid for use.
-
If the pipeline segment is not selected in the ROW field, click the down arrow and select the pipeline segment in the selection list.
-
Select a milepost record in the grid and then click
 OK to snap the SDL survey to the selected milepost.
-
-
When the Stationary Survey(s) window opens, click
 Process Files to automatically map data fields in the SDL survey with data fields in PCS.
Process Files / Stationary Survey(s)
After processing files, the definition window opens. The Maps pane includes a list of field mappings in the columns labeled Internal Field (PCS) and Transition Field (SDL survey).
-
Map PCS fields to transition field in the Maps pane.

Maps Pane
-
Click
 Edit to open a field selection window.
Edit Map Window
-
Click
 Auto Map to allow PCS to map PCS fields with fields from the import file based on column names.
 -
If the PCS field(s) you wish to map to data in a column of the imported file or to export to a file is not listed in the Mappings pane, navigate to and select the PCS fields in the Internal Fields pane and click the
 button or double-click the field(s) to move the selected fields to the Mappings pane.
 -
Select a row in the Mappings pane and either type a column name in the Transition Field cell (for Bridge exports) or locate the corresponding column name in the Transition Field pane and click the
 button or double-click the field (for Bridge imports) to map the selected fields.
 -
If the Choose a conversion.. field is present in the Mappings pane for one or more mapped fields and you want to apply a conversion option, click the Choose a conversion .. field and select an option in the resulting list.
-
To remove a field in the Mappings pane, double-click the field and then click
 Yes in the Warning window.
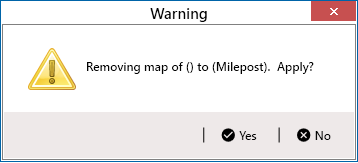
Warning Message to Delete Map
Fields with a
 lock icon are required and should not be removed, such as ROW Code, Milepost, Facility ID, and Inspection Date.
 -
Click
 Preview to view how the data in the import file would map with the configured mappings. Click
  Close to close the preview window.
-
-
Apply a filter to the data item. You can set up one or more filters that are applied to only the currently selected data item in the import definition. If the import definition is set up to run at a scheduled time, the filters will apply automatically. However, if an import definition is run manually, you will be prompted to select which filters to apply before running the import definition.
Click
 Edit in the Filters pane and define the filters that apply to the selected data item in the Edit Filters window. For detailed information about editing filters, refer to Set Filters for All or Selected Data Items.
 -
Click
 Save to save the definition file.