Set Up Imagery Studio
Complete the following steps to set up Imagery Studio:
-
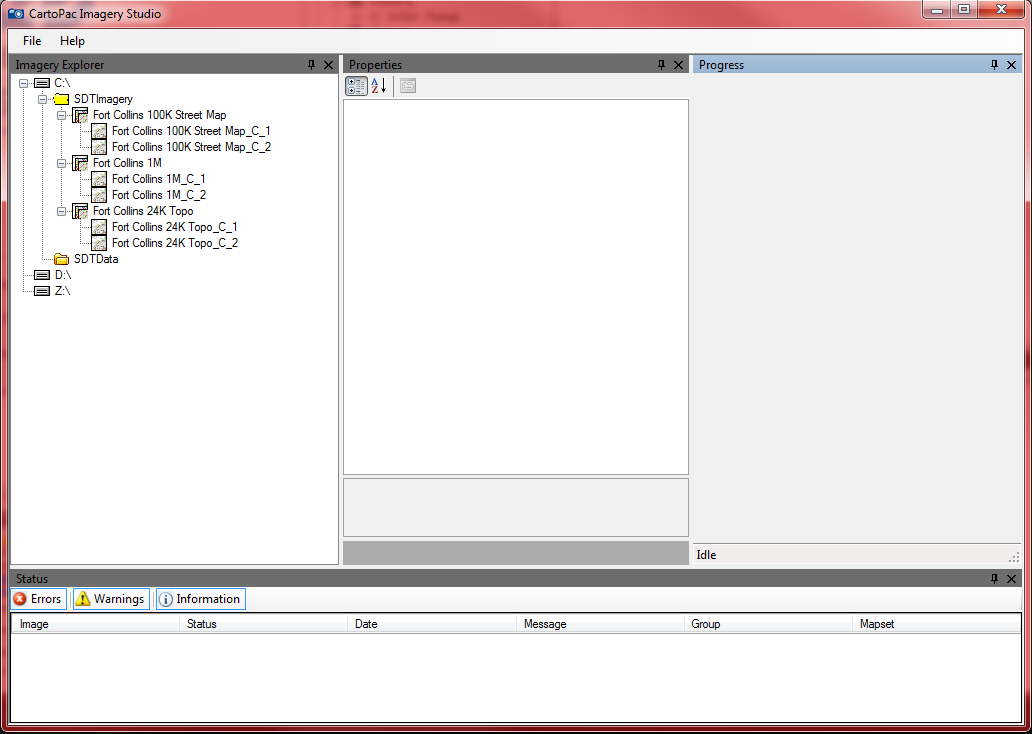
Open Imagery Studio.

Imagery Studio Window
Imagery Studio automatically looks for and connects to any SDTImagery folder found on the root of any drive on the computer (C, D, network, SD cards, Flash drives, etc.). If any SDTImagery folders exist, they will automatically display.
-
Right-click on the desired drive to create SDTImagery folder.
-
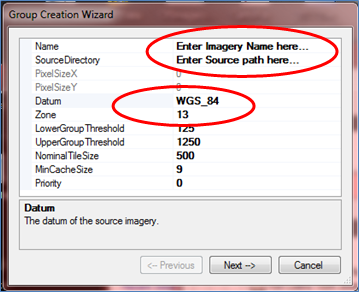
Right-click on SDTImagery folder and select Group Wizard. Enter the following information in the window:

Group Creation Wizard
-
A name.
-
A Source Directory (click on the box to the right, then on the ellipsis, navigate to the raw imagery, and select the first image in the raw imagery folder.
-
Enter in the datum.
-
Enter the UTM zone.
-
May set thresholds, which may affect the number of sub sets created.
-
-
Click Create.
-
To test the processed imagery set(s):
-
Open ArcMap.
-
Click on the Add Data button, navigate to the processed imagery folder, and look for a shape file contained in that folder (this shape file is the extent of that imagery data).
-
Open CartoPac Studio from ArcMap, add the shape file to the project, and download to tablet.
-
Open CartoPac Tablet, click File> Open and select the shape file project you just downloaded and the Auto select map option for background imagery.
-
You should now see the shape file boundary and the imagery if you are zoomed into the visible threshold of that imagery.
-
You can watch the progress of the processing by clicking on the Process bar at far right or open and anchor this pane to the display to watch the progress.