Getting Started with the EOS Skadi GNSS Reciever
Some initial configuration and checkout steps are necessary before using the EOS Skadi receiver. This section will cover hardware setup, app configuration, IMU calibration, and field testing steps.
Hardware Setup
-
Power on the receiver and verify it is in the proper operational mode.
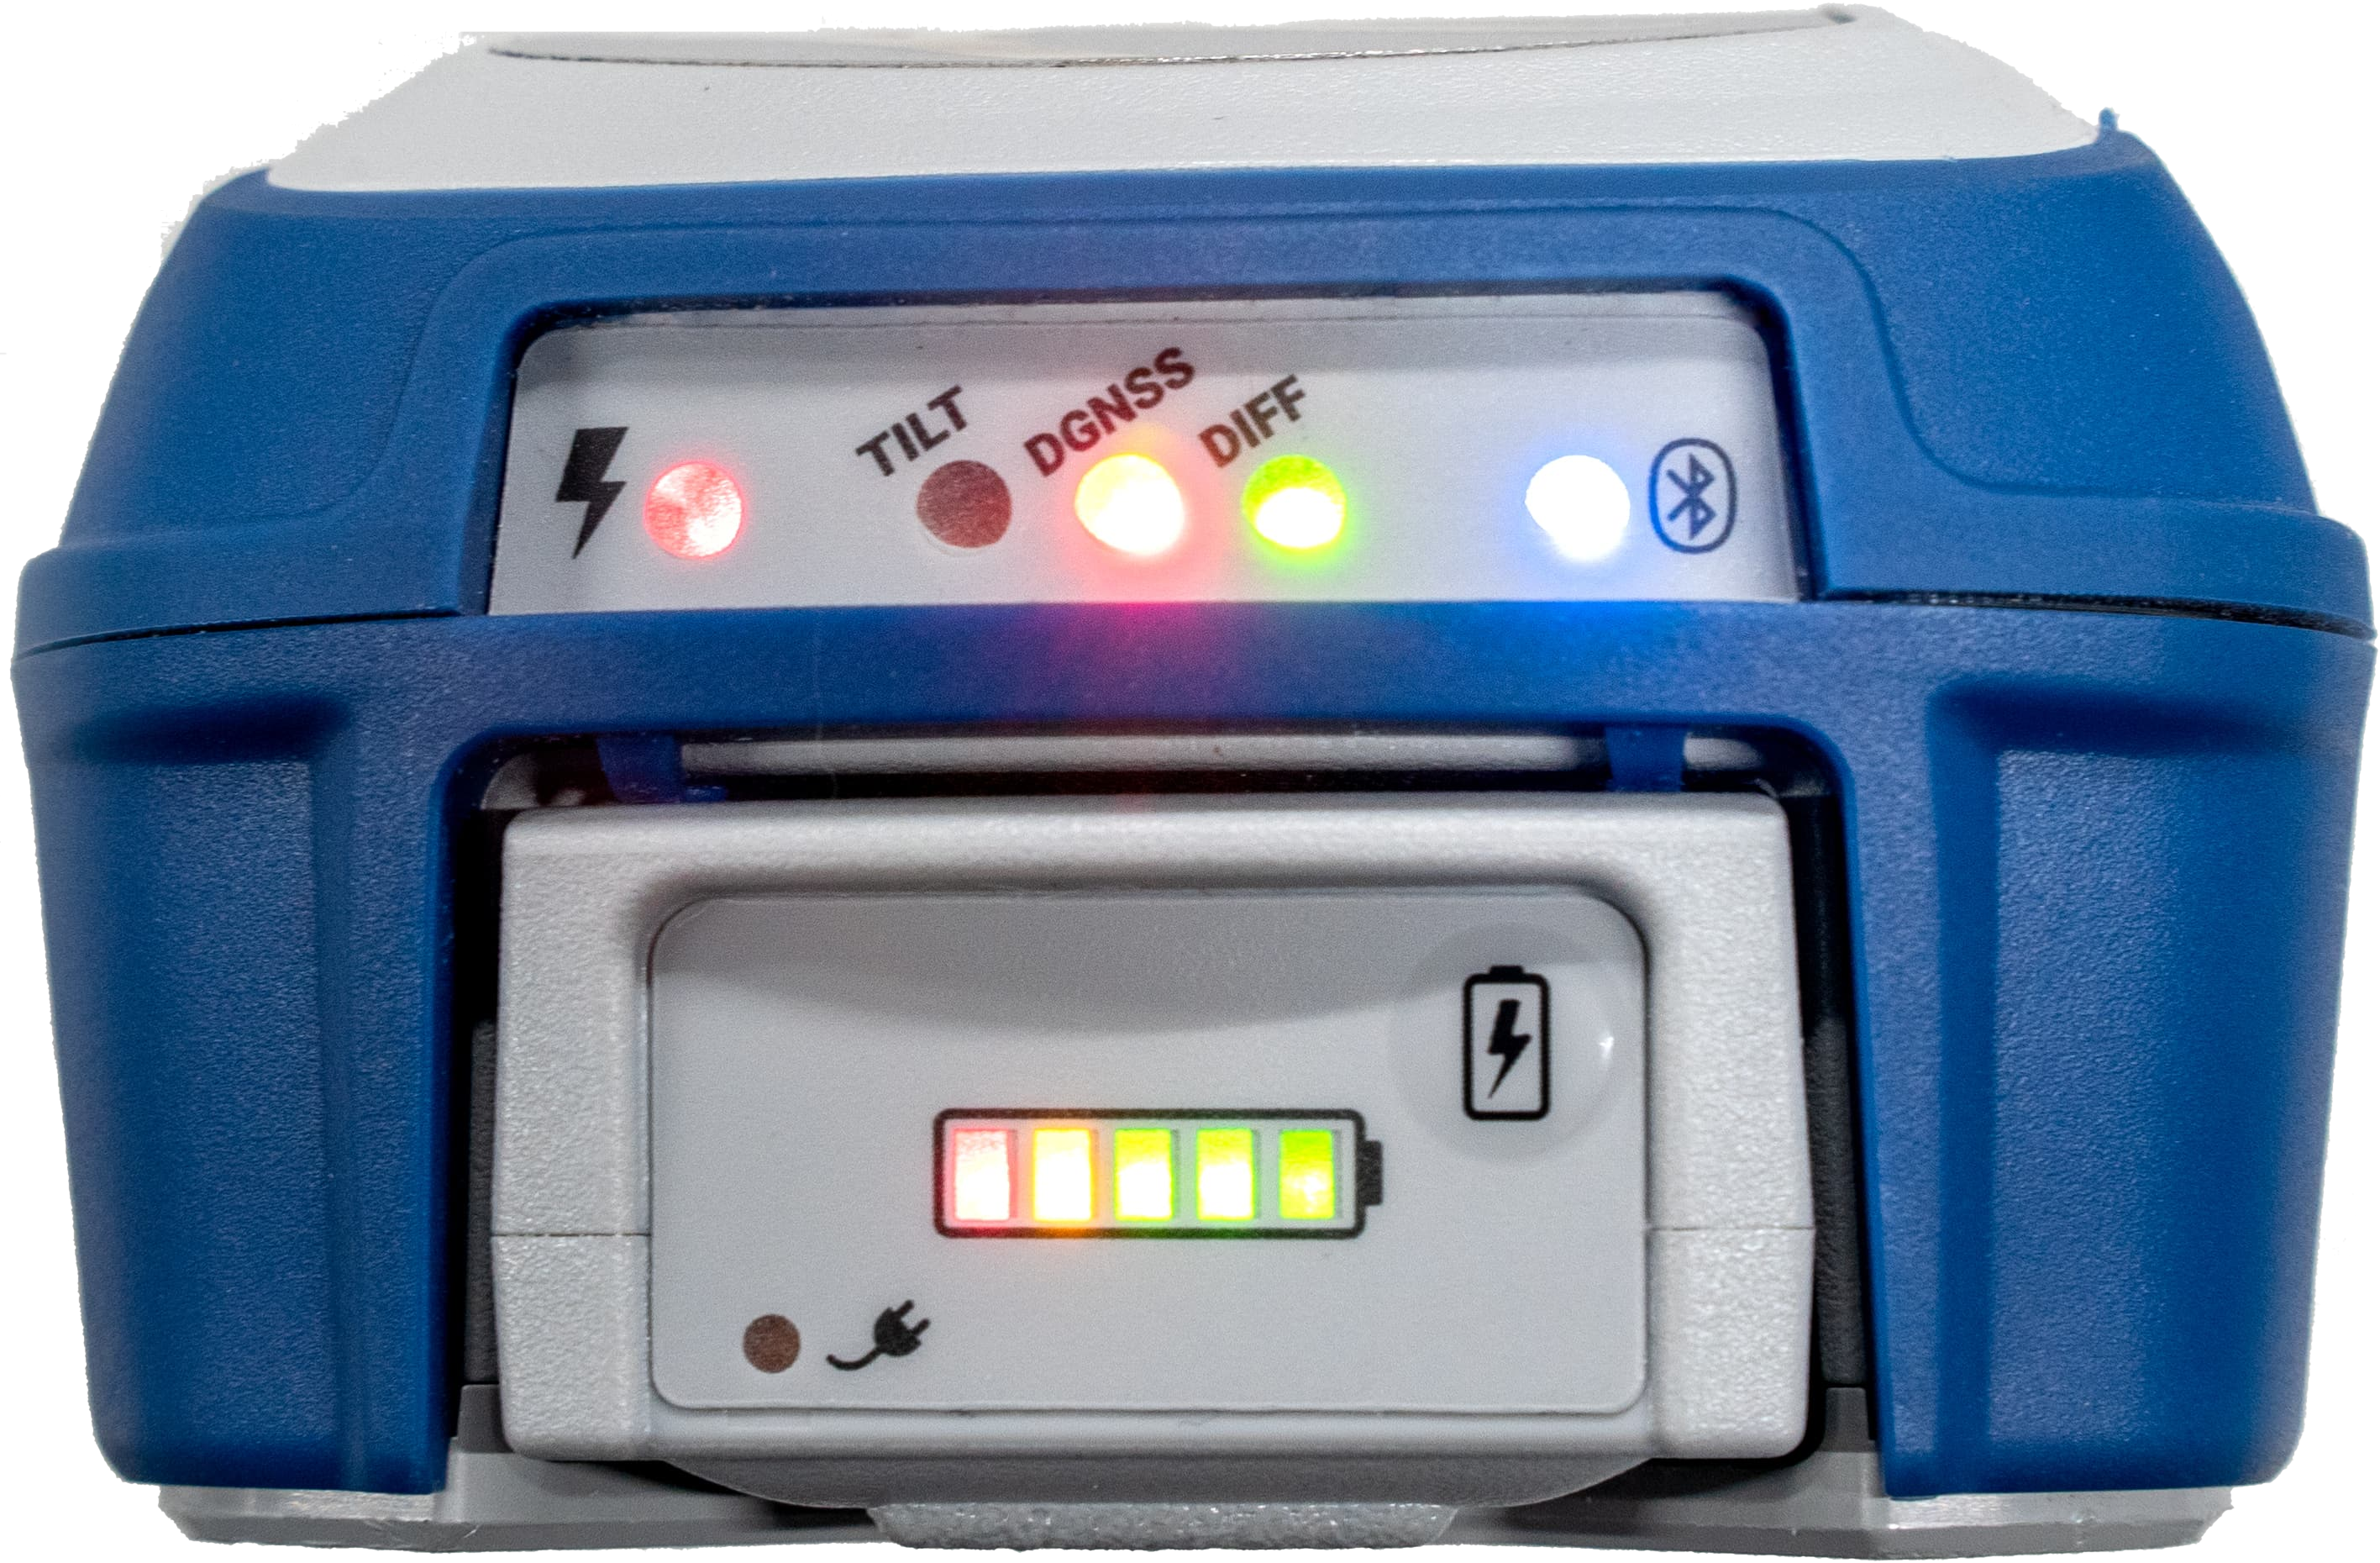
EOS Skadi Powered On
-
Connect EOS Skadi receiver to the mobile device with Bluetooth.
EOS Tools Pro Configuration
-
Download the EOS Tools Pro app from the Apple App store.
-
Enable TCP Server and NMEA Proprietary Messages.
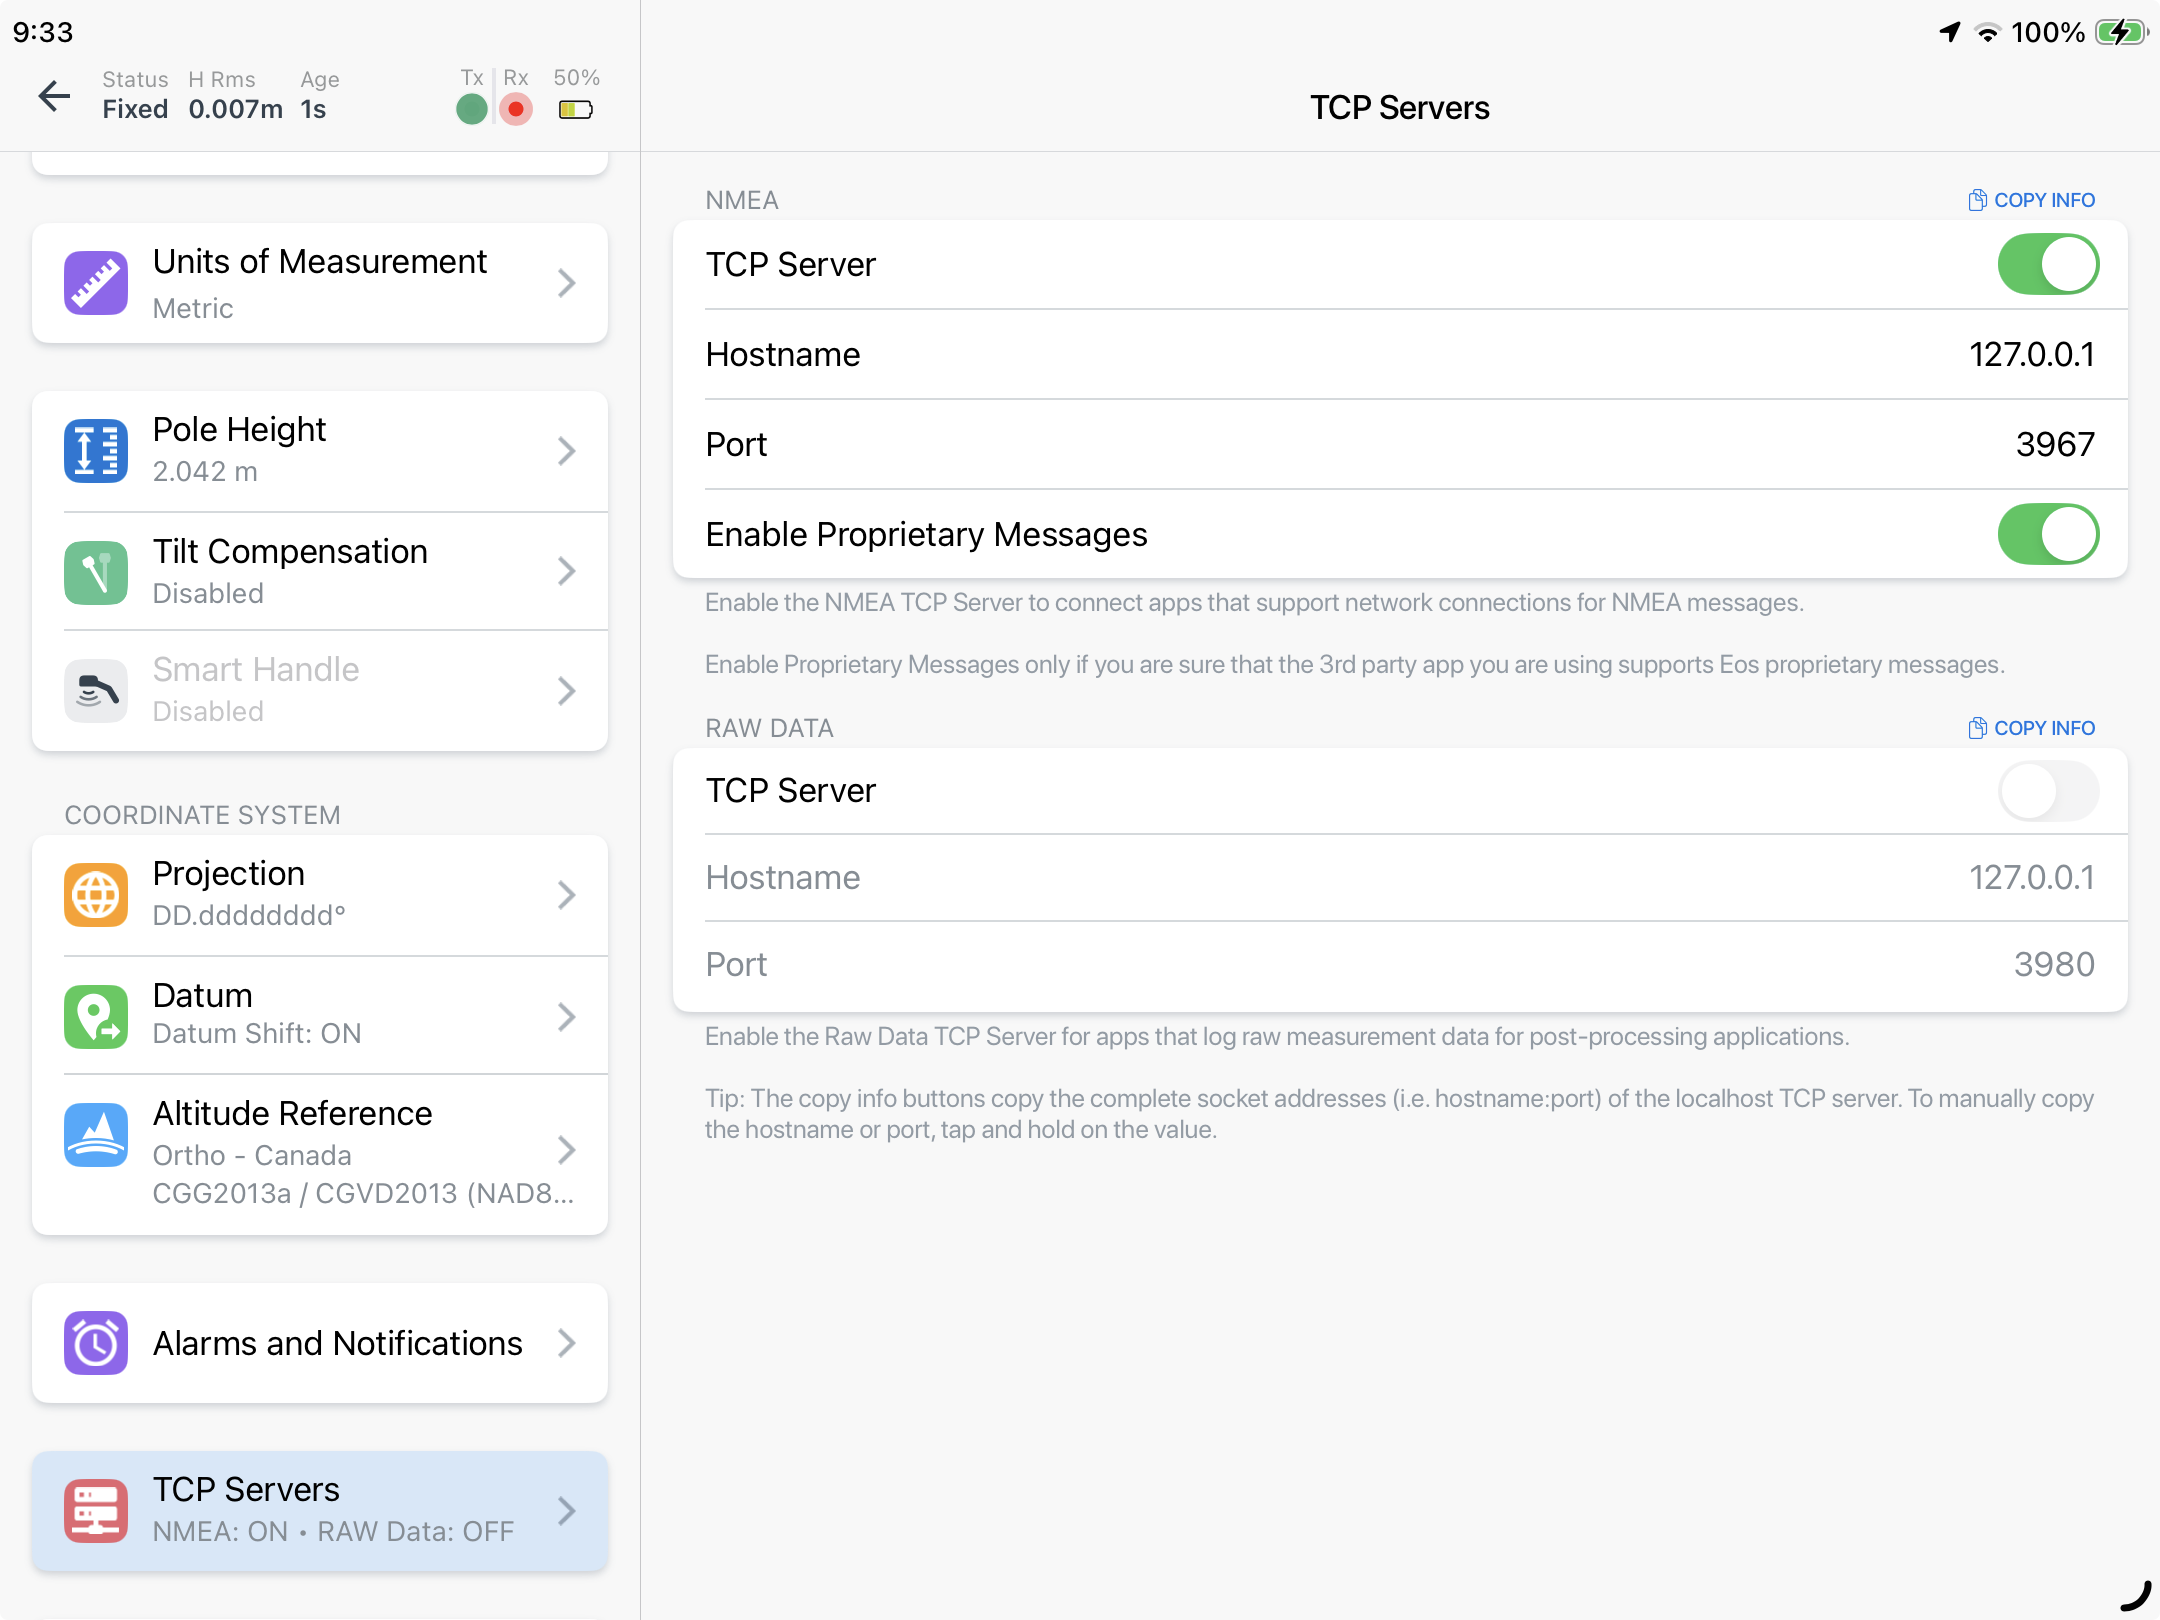
EOS tools TCP configuration
-
Set the receiver to the desired operational mode.
CartoPac Integration
-
Update CartoPac to v10.4
-
Configure CartoPac settings to use the EOS driver.
-
Test connectivity in CartoPac:
-
Enable GNSS in CartoPac.
-
The Sadki GNSS LED will show solid green when connected.
-
IMU Calibration
-
Pair the Skadi receiver with a Windows or iOS tablet via bluetooth.
-
Open CartoPac to configure and enable RTK connectivity.
-
Activate IMU calibration by pressing the Skadi power button 3 times.
-
Move the range pole in a small circular pattern until calibration is complete.
Field Testing
Test the desired operational mode (GNSS, Extensible Pole, Invisible Pole) with the GNSS reciever, smart handle, and tablet to verify proper operation before use.