Remove or Install the DVM1100
Refer to the following diagram to remove or install the DVM1100 into the Allegro QX.

Installing the DVM1100
It is recommended to clean the contacts on both the DVM1100 and the Allegro with isopropyl alcohol and a soft cotton cloth before installation on units that have been in the field.
Complete the following steps to remove the DVM1100 from the Allegro QX:
-
Remove the protective bumper from the Allegro QX using a 7/64" hex screwdriver to loosen the two captive screws.
-
Slide the DVM1100 out of the Allegro QX.
-
Place the bumper back on the Allegro QX.
-
Secure bumper with the two captive screws in the bumper with the 7/64" hex screwdriver.
Complete the following steps to install the DVM1100 into the Allegro QX:
-
Remove the protective bumper from the Allegro QX using a 7/64" hex screwdriver to loosen the two captive screws.
-
Slide the DVM1100 into the back of the Allegro QX.
-
Place the bumper back on the Allegro QX.
-
Secure bumper with the two captive screws in the bumper with the 7/64" hex screwdriver.
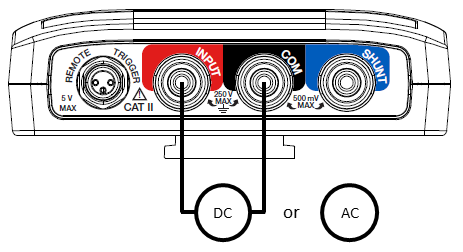
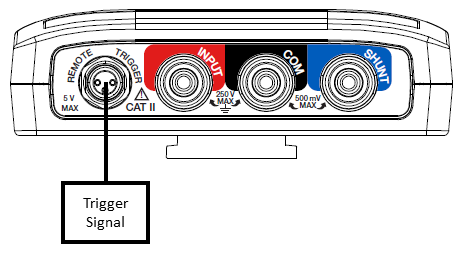
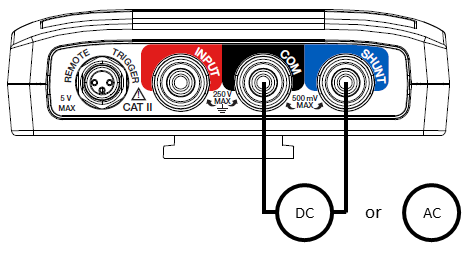
The following figures illustrate which inputs are used to take specific measurements (refer to Taking Readings in Periodic Survey with the DVM1100 for more details):

DC and AC Voltage Input Terminal

Remote Trigger Signal

DC and AC Voltage, Shunt Terminal