Replace Battery in Latched Enclosure Units
Electrostatic Discharge (ESD) can damage electronic components. To prevent ESD damage when handling electronic equipment, always wear an anti-static wrist strap attached to an unpainted, grounded metal object. Ensure the wrist strap has maximum contact with bare skin. If an anti-static wrist strap is available, discharge static electricity from yourself and your clothing by touching a grounded metal object before handling electronic equipment.
Complete the following steps to replace the 12 Volt lead acid battery in units that are housed in an enclosure, such as an RM4010:
-
Turn OFF power to remove power from field wiring.
-
Open the enclosure door and turn OFF the power switch.
-
Disconnect input channel wiring.
-
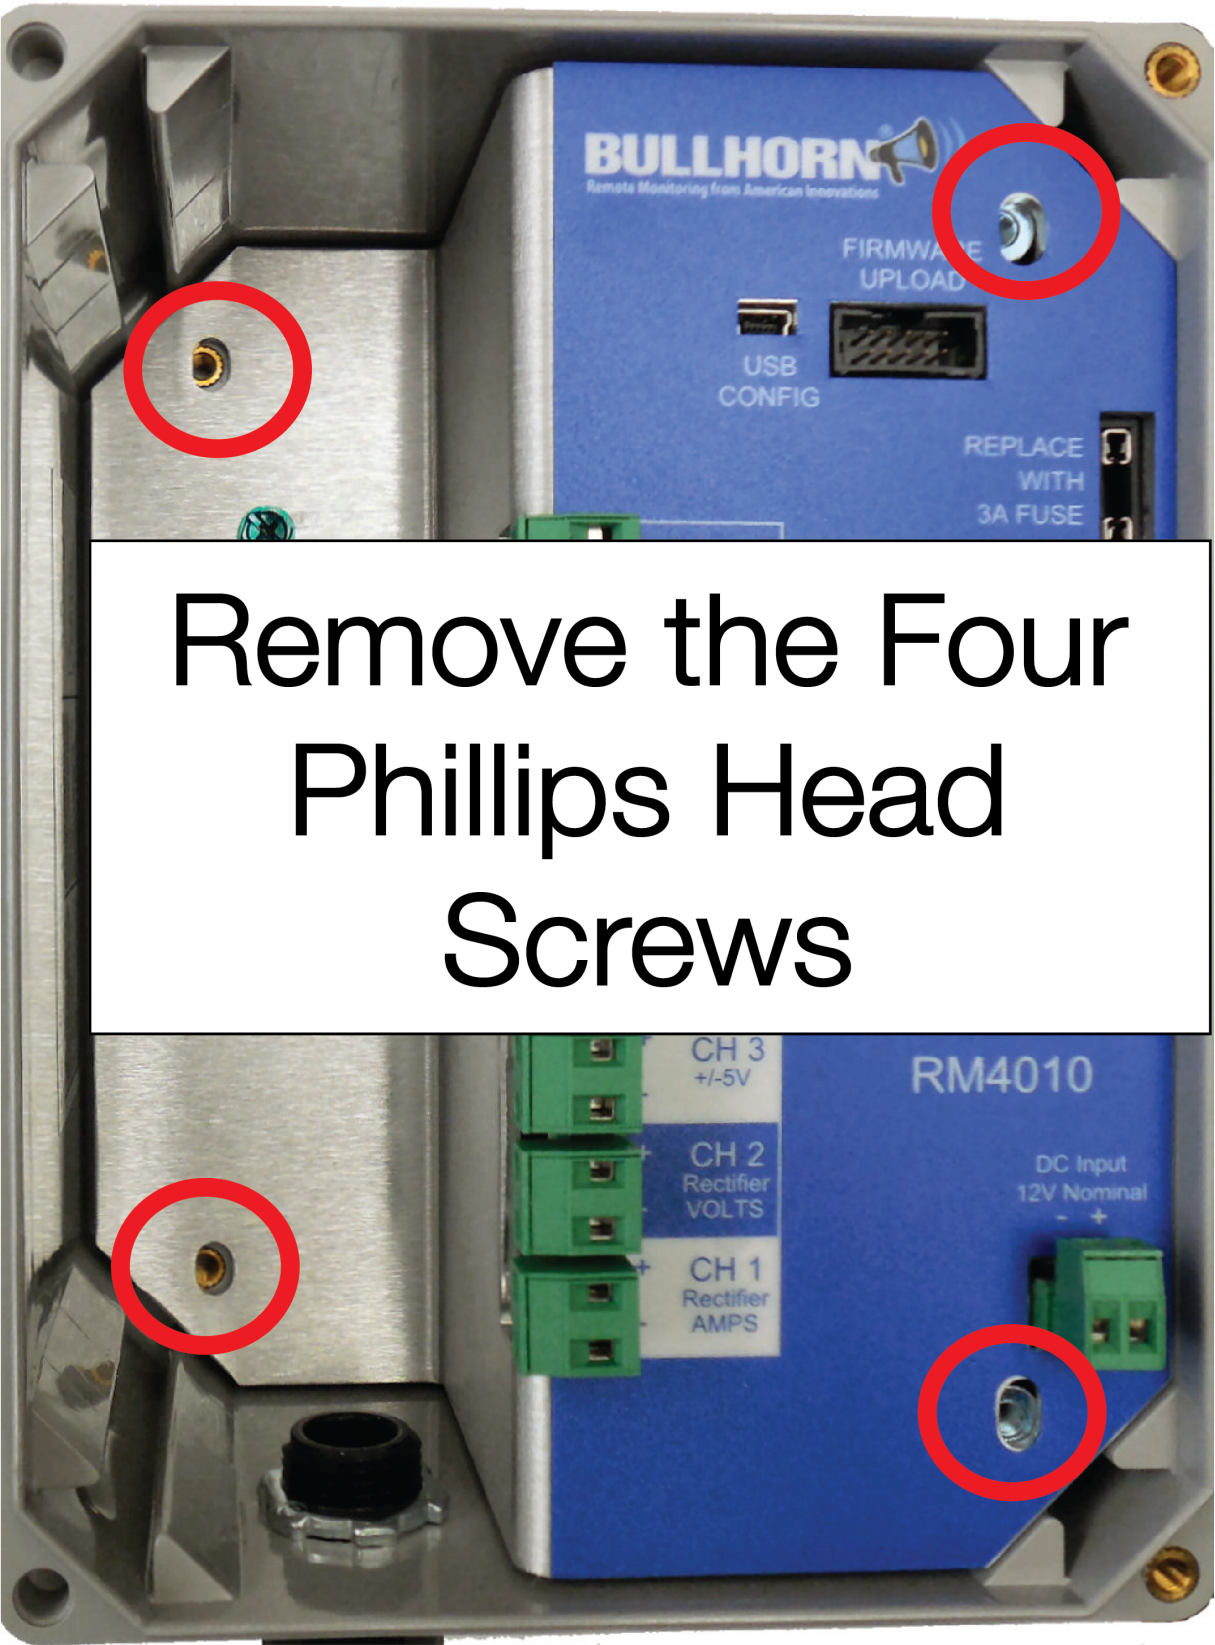
Use a Phillips head screwdriver to loosen the four (4) screws securing the faceplate. Remove screws and set aside for re-installation later.

Remove Faceplate
-
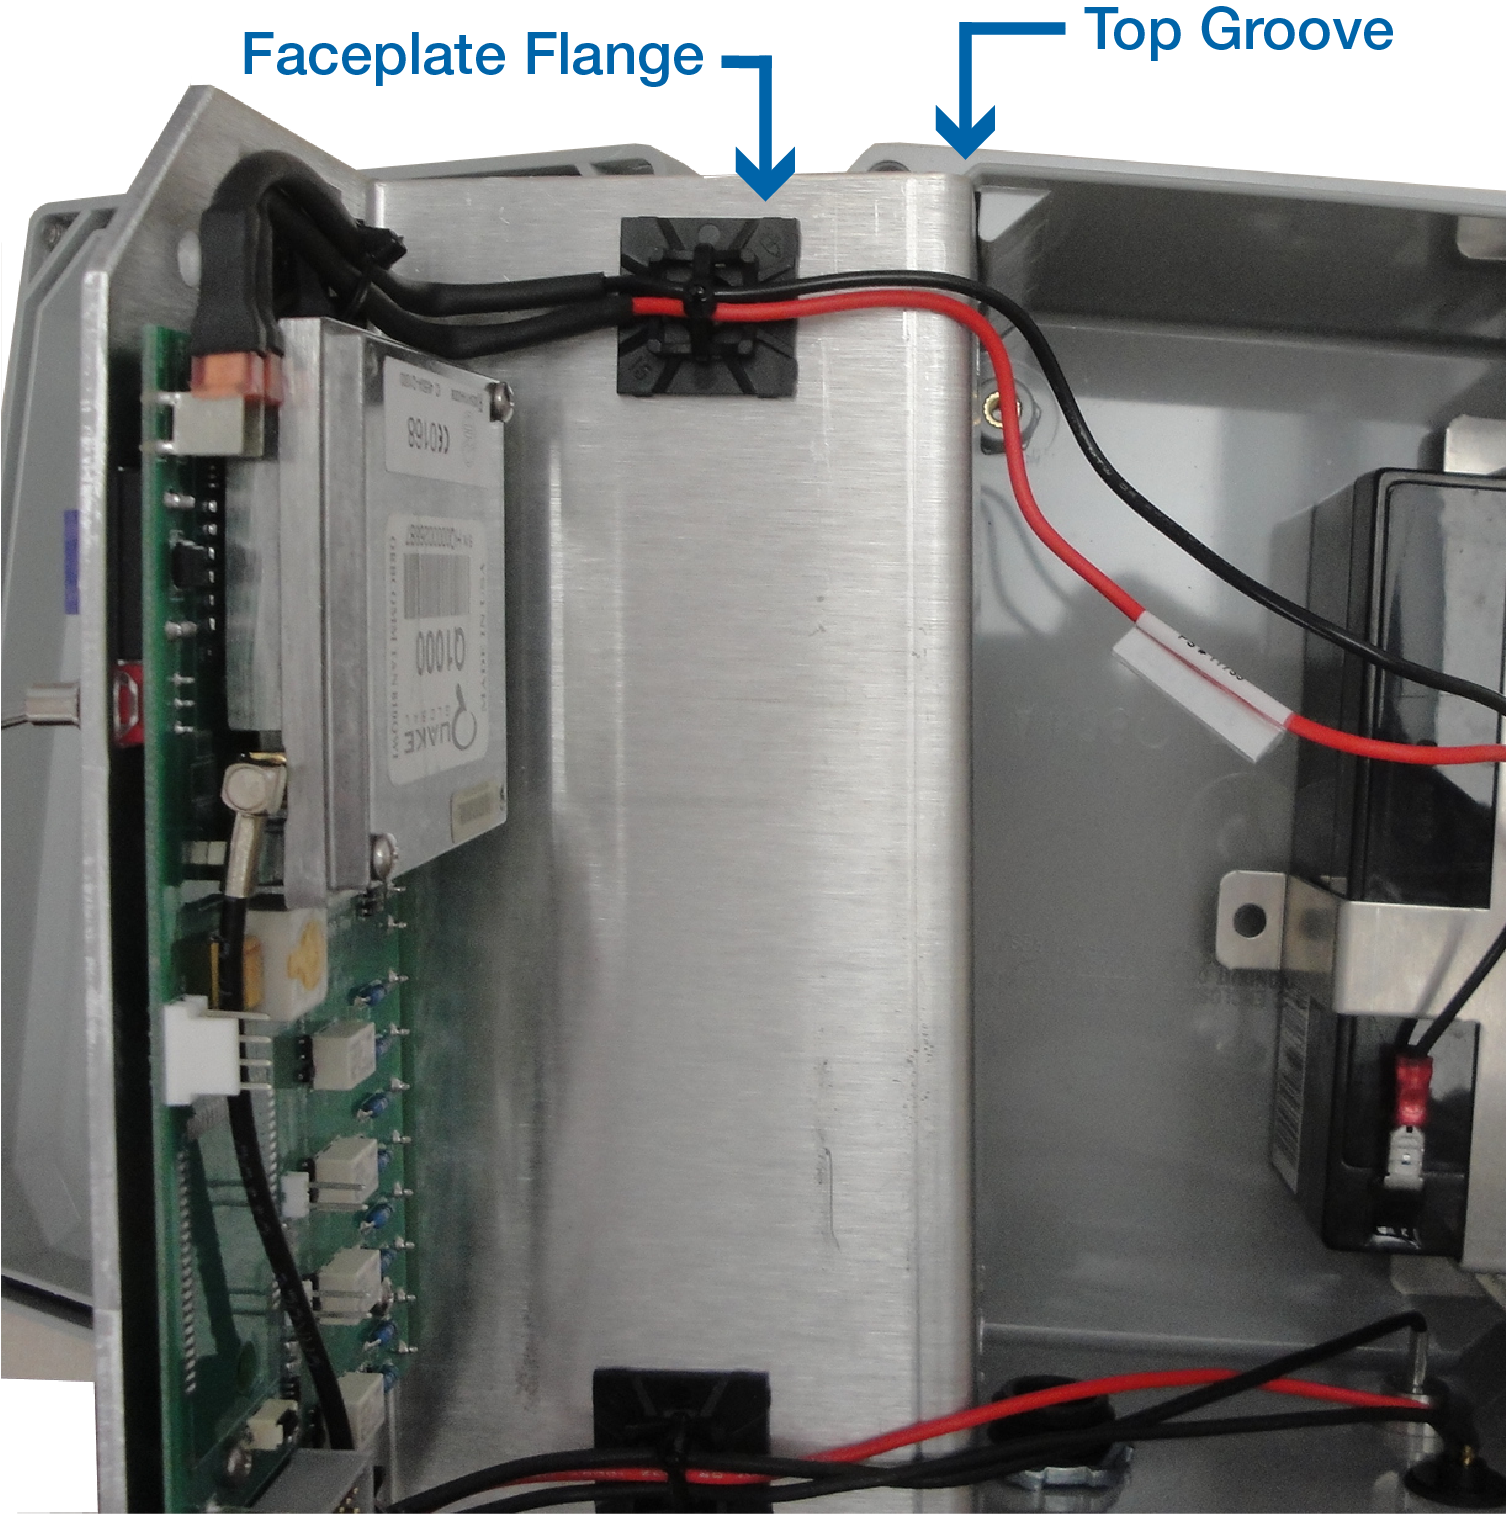
Lift up the faceplate and secure it inside the enclosure. You can also insert the top flange in the top groove inside the enclosure to secure the faceplate.

Secure Faceplate
-
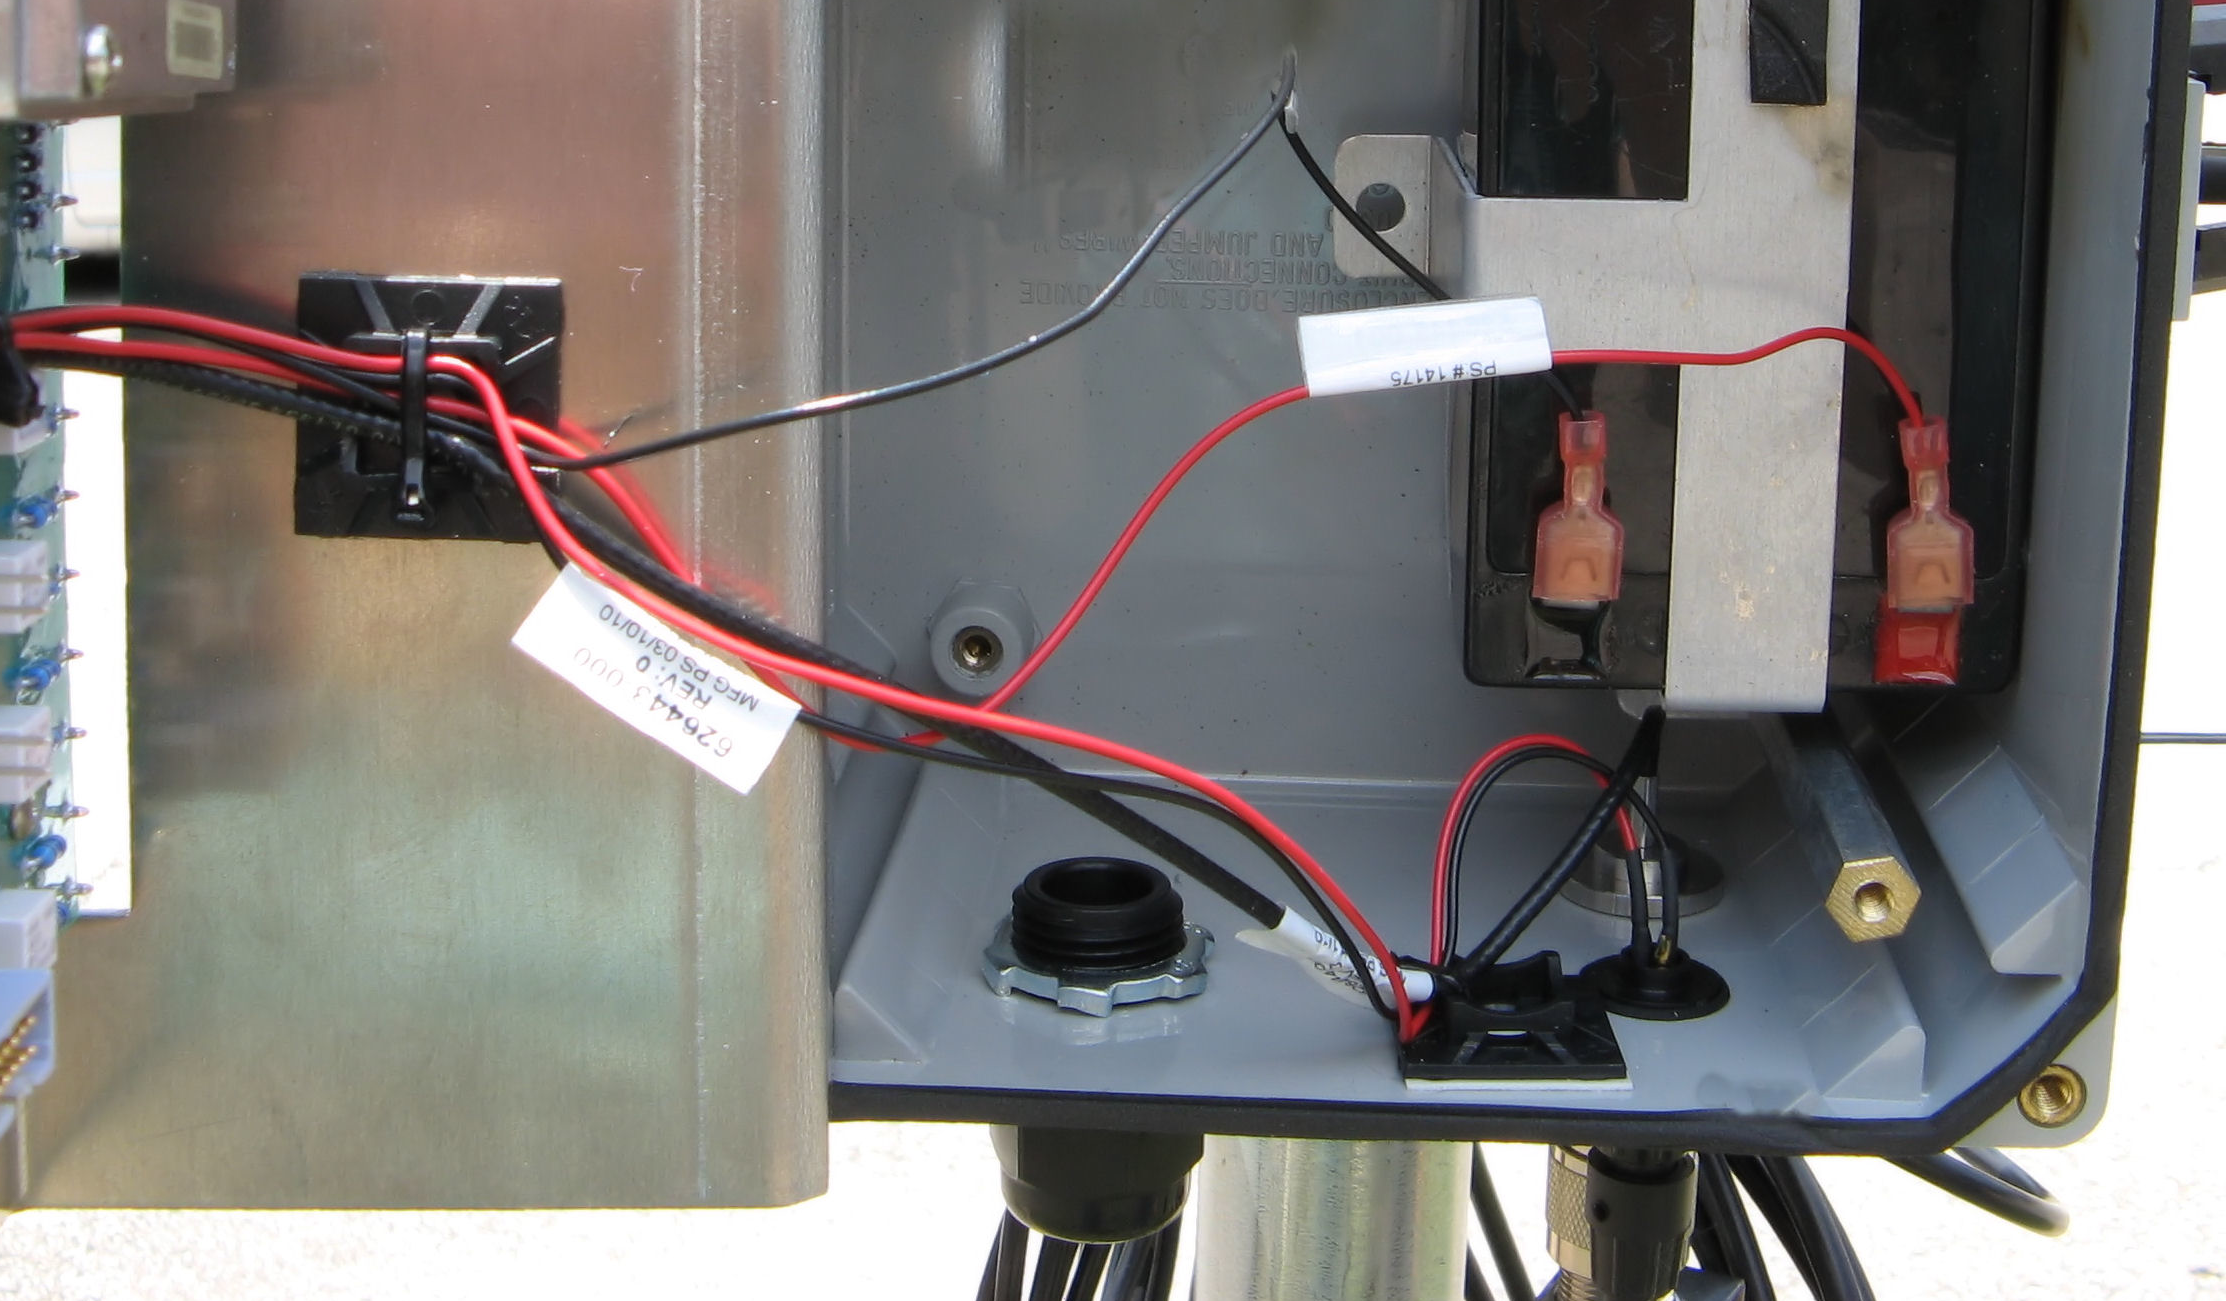
Disconnect the red positive (+) and black negative (–) battery cables from the battery.

Disconnect Battery Cables
-
Use a 3/8 inch nut driver to remove two (2) standoffs securing the battery bracket. Set the standoffs and battery bracket aside for reinstallation later.
-
Install the new battery. Secure the battery using the battery bracket and standoffs set aside earlier.
-
Reconnect the battery cables to the battery; positive to positive (red) and negative to negative (black).
-
Reinstall the faceplate using Phillips head screws set aside earlier.
-
Reconnect input channel wiring.
-
Turn ON the unit power switch and then close the door of the enclosure.
-
Turn power ON to restore power to field wiring.
The battery replacement is now complete.