Connect Input Wires
Ensure that power to the rectifier has been turned off before wiring to unit.
Complete the following steps to connect input wires to the RM4150 or RM4151.
American Innovations recommends using AI part number 211061-000 (Belden 5308UE), or equivalent, for wiring inputs.
-
Connect your rectifier input wires to the RM4150 (DIGITAL CH 1 and DIGITAL CH 2 and ANALOG CH 1 through ANALOG CH 5) or to the RM4151 (DIGITAL CH 1 and DIGITAL CH 2 and ANALOG CH 1 and ANALOG CH 2). Refer to for unit input specifications.
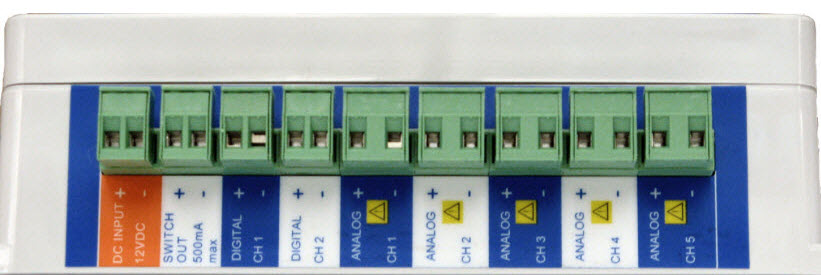
Unit Inputs - Side View
To ensure a clean stable reading, keep field wiring as short as possible and use shielded twisted pair wire such as Alpha 2463C.
-
Dress input wires inside the rectifier.
-
Connect unit input wires to the output terminals of your rectifier.
If wires are to be buried or covered, conduit must be used to protect wires.
-
If rectifier is turned off, turn ON to restore power to field wiring.
-
Continue with Configuration Overview to configure the unit for service.
-
After configuring the unit:
-
Remove USB cable and re-attach USB port cover.
-
If the unit is to be placed (not mounted) inside the rectifier, position the unit to the front or rear of the rectifier case so that the unit covers only a minimal amount of the rectifier air vent.
-