DC Voltage, AC Voltage, or Shunt Measurements
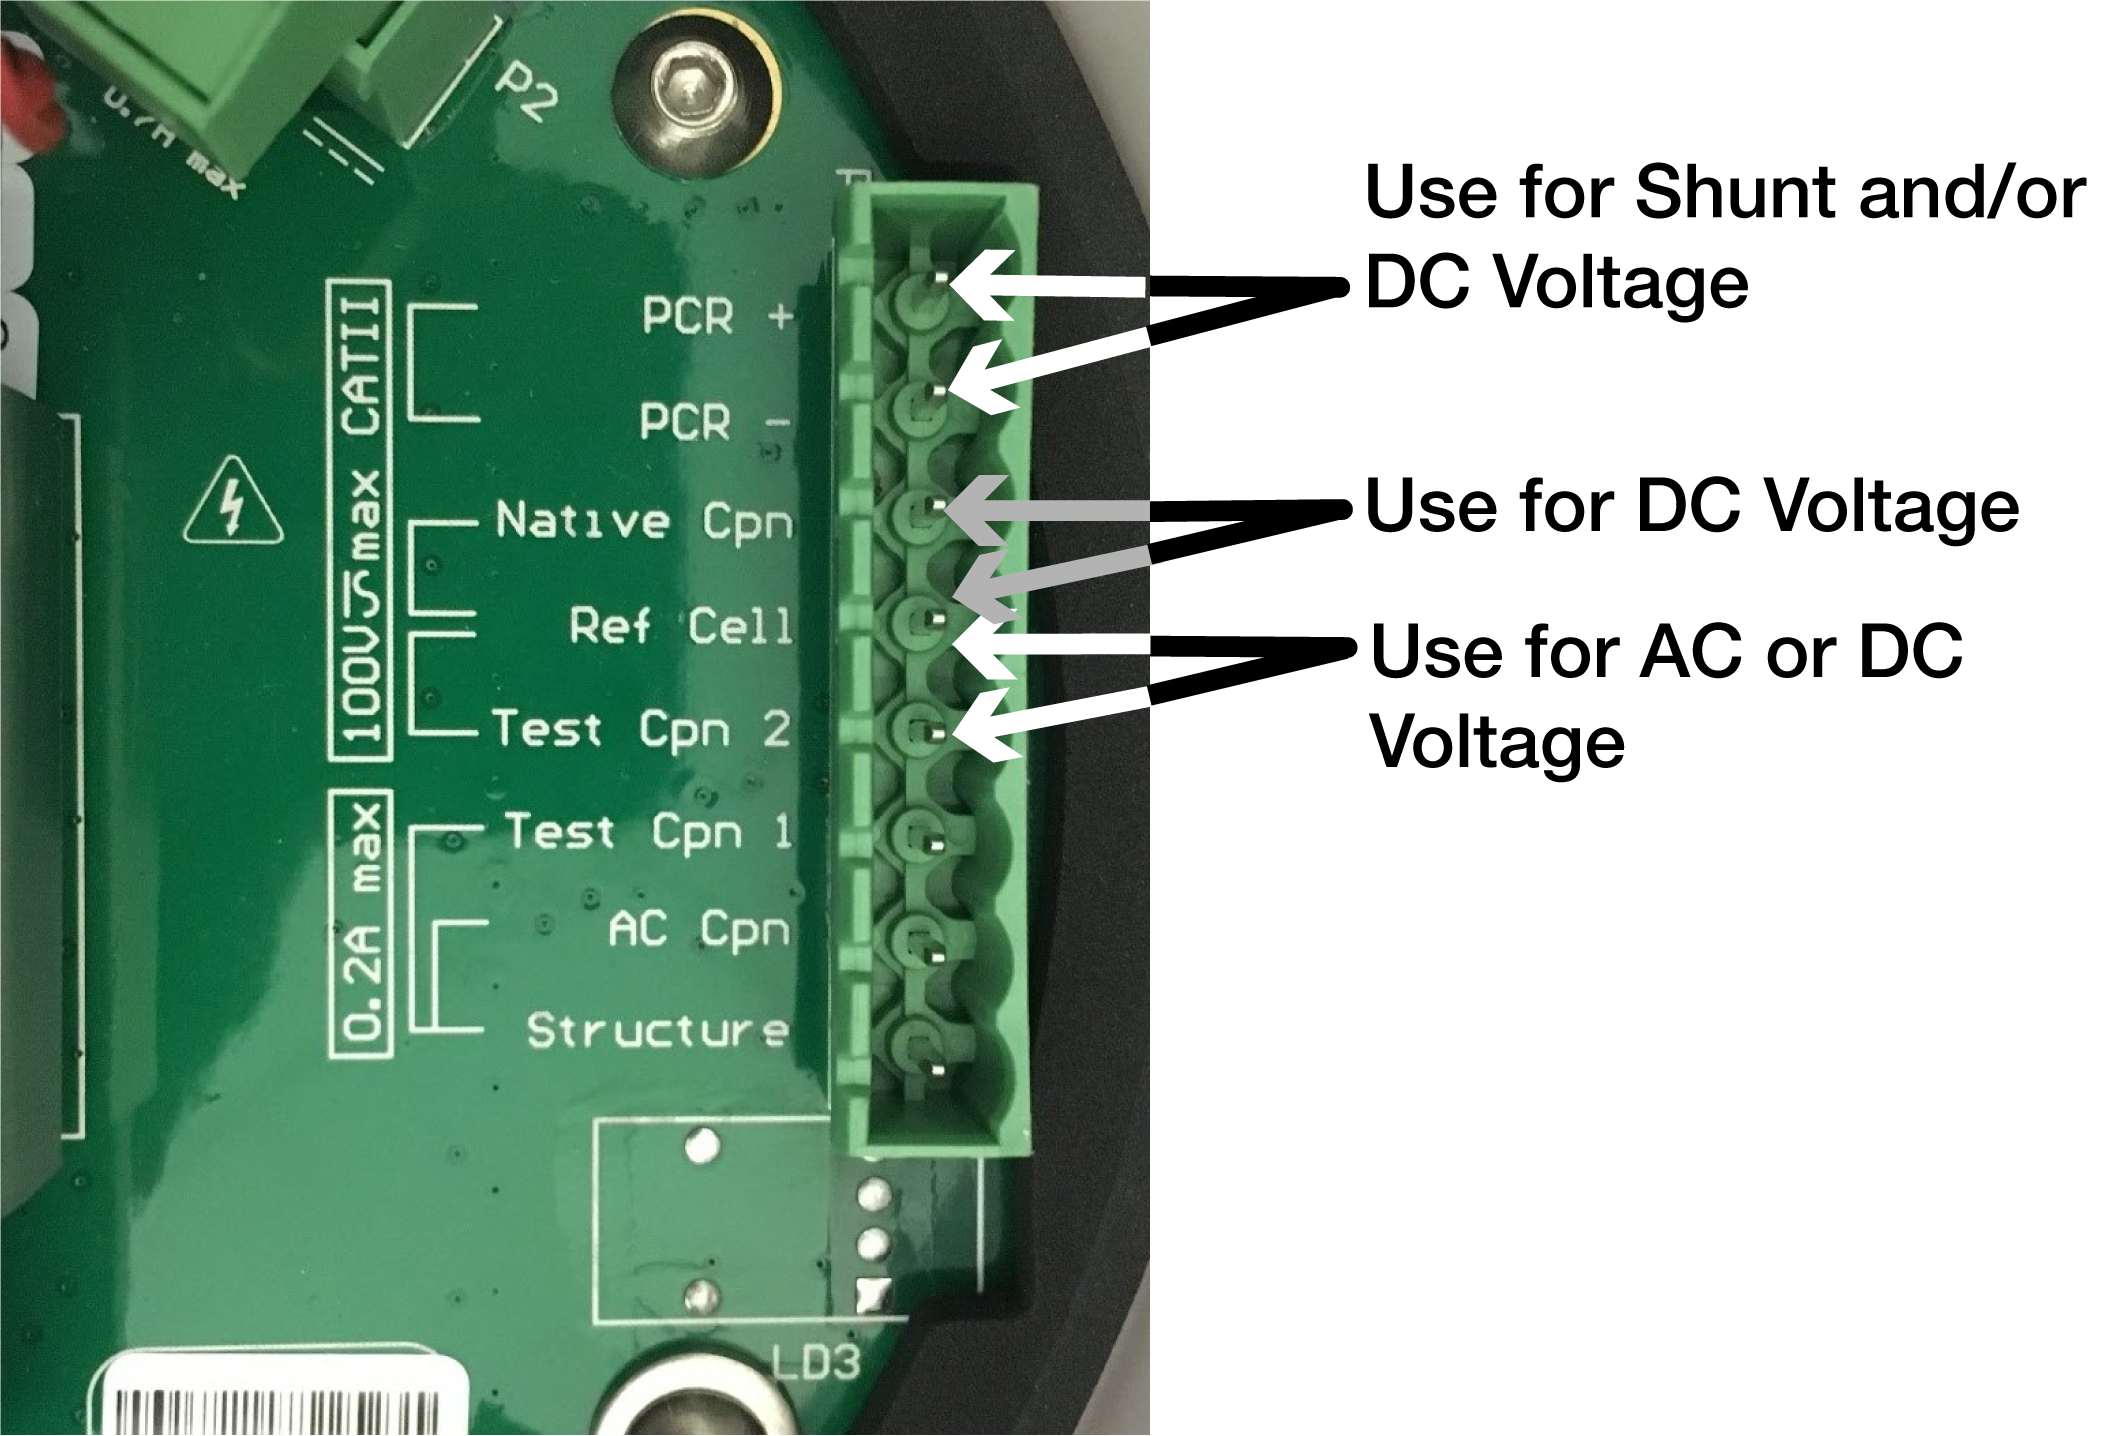
If not using the included wiring harness, you will need to remove all wires from the phoenix connector first and then connect your wiring to the connector where it will line up to the labeled ports on the RM4210/RM4250 faceplate. Refer to the following figures when wiring the RM4210 for DC voltage, AC voltage, or shunt measurements:

Wiring Diagram - DC Voltage, AC Voltage, and Shunt

RM4210 Faceplate and Port Labels
DC voltage measurement
-
Connect your positive to the RM4210/RM4250 wiring harness black Native Cpn wire and the negative to the yellow Ref Cell wire.
-
If you need a second DC voltage measurement, connect the positive to the blue Test Cpn 2 wire and the negative to the yellow Ref Cell wire (along with the first DC negative) on the wiring harness.

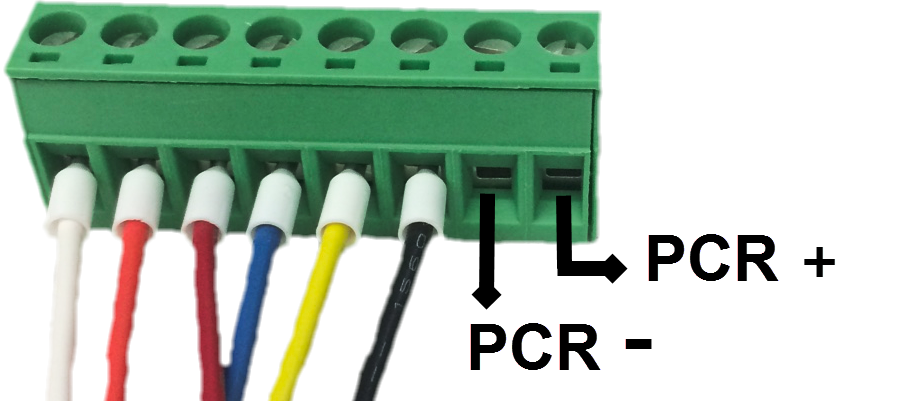
RM4210/RM4250 Wiring Harness
If you are taking two DC measurements — use the Ref Cell connection on the RM4210/RM4250 as a common ground for both.
-
If you need a third DC voltage measurement, connect the positive to the PCR+ and the negative to the PCR- connections on the RM4210/RM4250 green phoenix connector.

PCR- and PCR+ Connections on RM4210/RM4250 Connector
AC voltage measurement — connect the blue Test Cpn 2 wire and the yellow Ref Cell wire on either side of where you want to measure AC potential.
Shunt measurement — connect the positive for the shunt to the PCR+ and the negative to the PCR- connections on the RM4210/RM4250 green phoenix connector.