Common Wiring Configurations
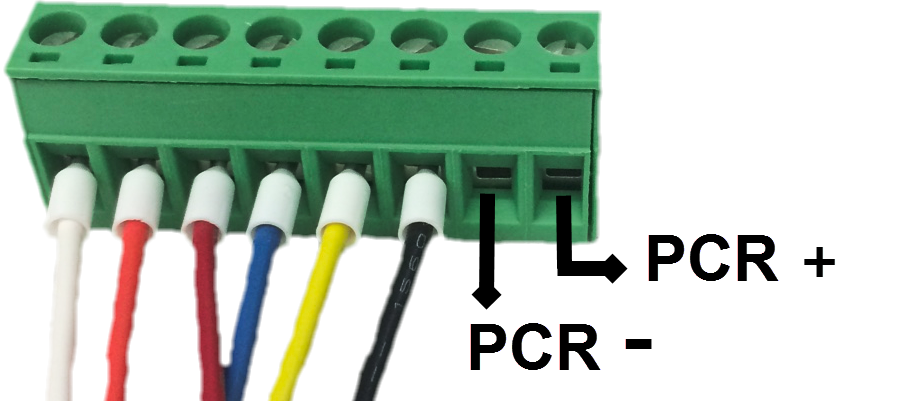
The RM4210/RM4250 can be wired directly to what will be measured. The RM4210/RM4250 is shipped with a wiring harness that includes six colored and labeled wires for easy identification.

RM4210/RM4250 Wiring Harness
Common wiring configurations include the following:
-
Structure or Pipe Connection — connect the white Structure wire from the wiring harness to the point on the test station that is connected to the Structure.
-
Reference Cell — connect the yellow Ref Cell wire from the wiring harness to the point on the test station that is connected to the reference cell.
-
Native or Non CP-protected Coupon — connect the black Native Cpn wire from the wiring harness to the point on the test station that is connected to the native or non CP-protected coupon. If there is not a native/non CP-protected coupon, cap off the end of this wire. If the native/non CP-protected coupon has two wires, connect one wire to the test station and cap off the other wire.
Remove any switch or jumper on the test station head that is used to connect the CP-protected coupon (AC Coupon or Test Coupon) to the Structure, where the CP-protected coupon is used to measure AC current density or instant off.
-
PCR, AC Drain, SSR, or Dairy Land — connect the positive wire to the PCR+ and the negative wire to the PCR- connections in the green phoenix connector. The connections match the port labels (PCR+ , PCR- ) on the RM4210/RM4250 faceplate. For additional information on using a PCR with the RM4210/RM4250, refer to the Bullhorn RMU.

PCR- and PCR+ Connections