View Records Based on a Schedule
You can display records in a data entry grid based on a schedule.
Scheduling criteria and a schedule definition must be set up prior to performing the following procedure. Refer to Schedules for more information.
Examples used in the instructions are based on the CPDM module. However, the information applies to all modules.
These instructions start with the assumption that a PCS module is already selected and the correct pipeline segments have been selected. For information detailing how to select pipeline segments, refer to Select ROWs.
Complete the following steps to view records in a grid based on a schedule:
-
Click Data Entry > Edit <module> Data to open the Edit <module> Data window.
-
Select a data entry grid. For example, click the Inspection tab and then the Test Point button to display the Test Point Inspection data entry grid.
-
If you want to collapse the Selected ROWs pane to view more of the grid, click the Selected ROWs bar. Clicking the bar again expands the pane.
-
If the Options window is not open, click Options.
-
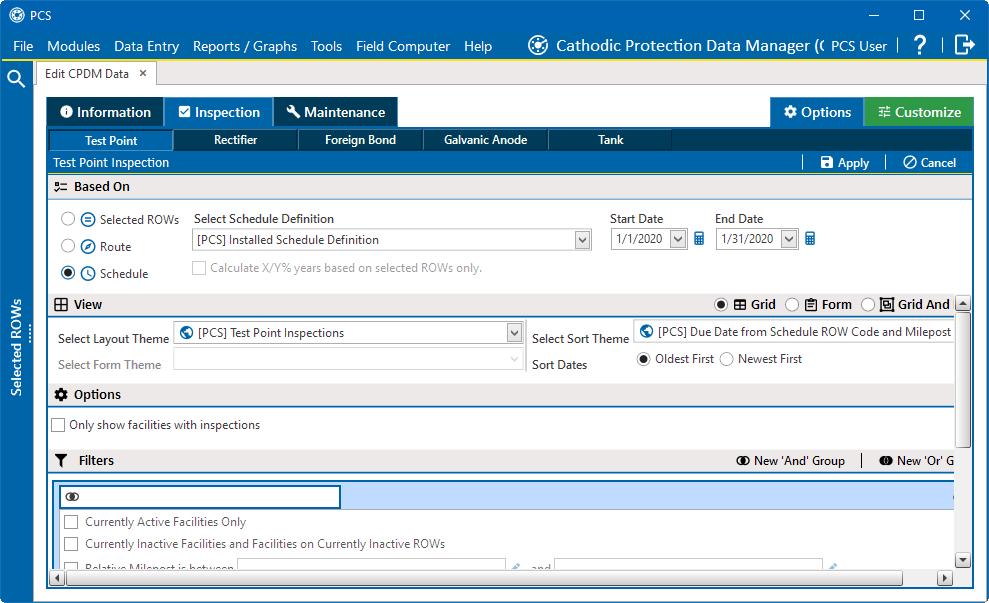
In the Based On section, select Schedule.

Inspection Tab Options
-
Select a schedule definition from the Select Schedule Definition drop-down list.
-
To set up a schedule date range using a calendar:
-
In the Start Date field, set a schedule start date by entering a date or selecting a date from the calendar. When typing a date, use the format MM/DD/YYYY to indicate the month, day, and year.
-
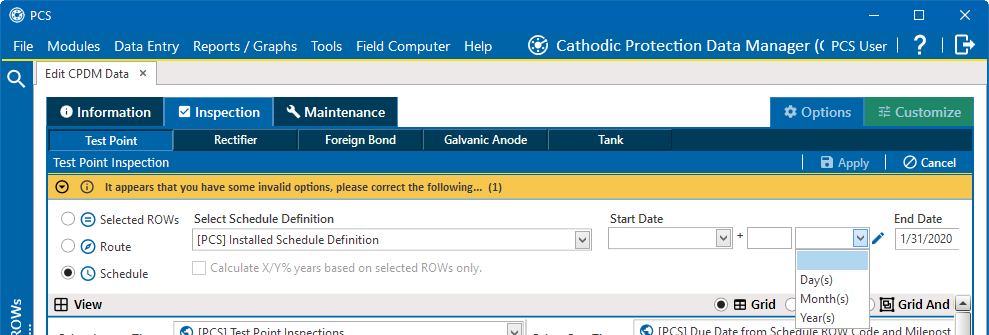
To set a dynamic value for the Start Date, click the
 icon to expand the field. In the first field, enter a value for the number of days, months, or years from the Start Date. Select an interval from the second drop-down field.
Dynamic Start Date
-
To close the dynamic fields click the
 icon.
icon. -
In the End Date field, set a schedule end date by entering a date or or selecting a date from the calendar. When typing a date, use the format MM/DD/YYYY to indicate the month, day, and year.
-
To set a dynamic value for the End Date, click the
 icon to expand the field. In the first field, enter a value for the number of days, months, or years from the End Date. Select an interval from the second drop-down field.
-
-
Click
 Apply. The Options window will close, and the data entry grid will open and display records based on the selected schedule definition and date range.