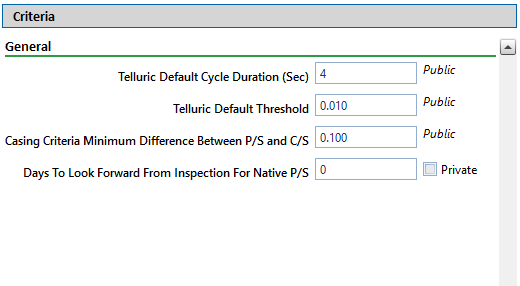
If the Options window is not open, click Tools > Options to open the window. Then click the Criteria tab to open the Criteria options page.

If your PCS license includes the optional Telluric Compensation feature, two Telluric fields are included in the Criteria page. Modify the following fields as needed:
-
Telluric Default Cycle Duration (Sec) — Enter a time in seconds in the field provided to define the amount of time for a GPS synchronized on and off cycle.
-
Default Telluric Threshold — Enter a value in volts in the field provided to define the threshold used to identify telluric effects in an SDL (stationary data logger) data set.
PCS calculates a baseline average for survey measurements in an SDL data set. If any survey measurement in the data set is above or below the baseline average by the amount specified in the Default Telluric Threshold field, this indicates the data set exhibits telluric current effects.
For information about how to upgrade a PCS license to include Telluric Compensation, contact Technical Support.
Identify the isolation criteria for casing inspections. Type a value in the field Casing Criteria Minimum Difference Between P/S and C/S to set the minimum difference allowed between pipe-to-soil (P/S) and casing pipe-to-soil (C/S) readings before the casing is considered shorted. The default setting is 100 mV.
PCS displays a warning message when the minimum difference does not meet the casing criteria for an inspection reading entered in the data entry grid. Similarly, an entry is added in the Field Computer Log when inspection readings transferred from the Allegro do not meet casing criteria.
Identify the number of days after an inspection reading is taken that a native pipe-to-soil (P/S) reading is taken. Type the number of days in the field Days To Look Forward From Inspection For Native P/S.
The number of days effects the system calculation for the fields Effective Native P/S and Effective Native Date in data entry grids. Native P/S is a potential reading taken prior to any current placed on the pipeline. It is also referred to as a depolarized or static potential reading.
(SysAdmin only) For property settings accompanied by a Private check box, check or uncheck the check box based on your company's requirements. When the Private check box is checked, the currently logged in user can change the associated property setting. For more information, see Understanding Public and Private Property Settings.
Click ![]() Save to save changes.
Save to save changes.