Verify the Field computer is connected to your computer. If needed, refer to the Allegro User Guide for information about how to connect the device.
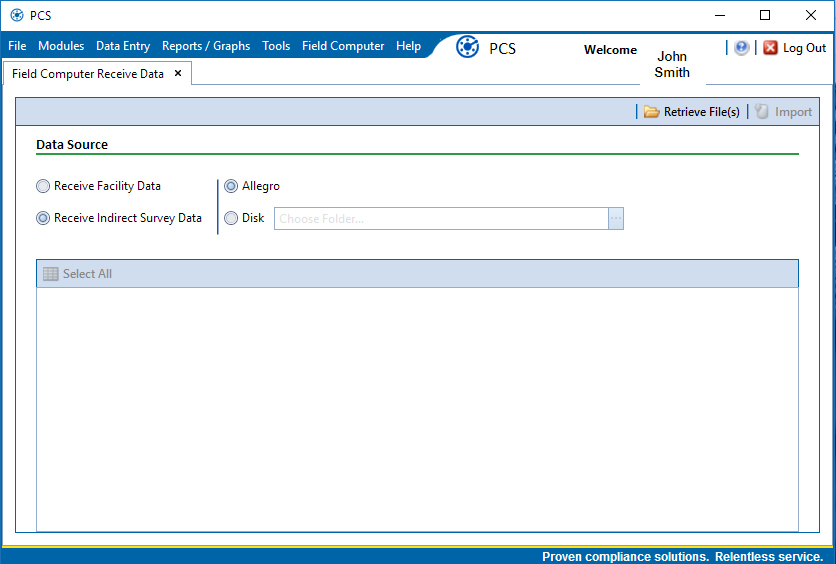
Click Field Computer > Receive to open the Field Computer Receive Data window.
Identify the location of the survey data by doing one of the following:
-
To receive data directly from a connected field computer, click Receive Indirect Survey Data, then click the Allegro option.
-
To receive data that has been saved to a file on your computer, click Receive Indirect Survey Data, then click the Disk option. Click the Choose Folder ellipsis and navigate to and select the folder containing the (.dat or .dva) files. Click OK. The field updates to list the path to the selected folder.
Click ![]() Retrieve File(s) to view a list of periodic survey files available for selection.
Retrieve File(s) to view a list of periodic survey files available for selection.
Select the survey files you want to transfer. Click the check box for one or more survey files in the list of files available for selection.
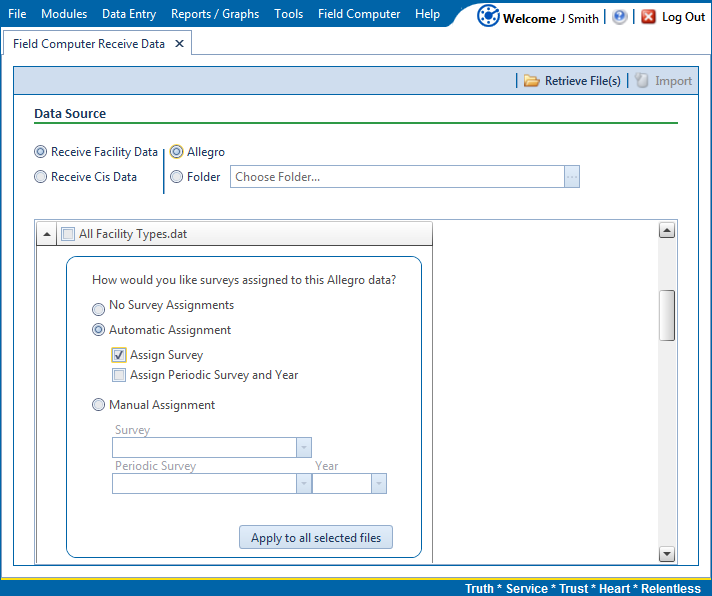
Click the ![]() icon for a
selected survey file to view the following options for assigning survey data to a
PCS survey folder:
icon for a
selected survey file to view the following options for assigning survey data to a
PCS survey folder:
-
Select No Survey Assignments if you do not want to assign field computer survey data to a survey folder.
-
Select Automatic Assignment and then select one of the following options to have PCS automatically assign field computer survey data to a survey folder:
-
Assign Survey: Select this option if you want PCS to automatically assign survey data to an annual or multi-year survey folder based on the inspection date of the field computer survey data.
-
Assign Periodic Survey and Year: Select this option if you want PCS to automatically assign survey data to a periodic survey folder based on the inspection date of the field computer survey data.
-
Select Manual Assignment and then select one of the following options to manually select a survey folder for assigning field computer survey data:
-
Survey: Select this option to choose an annual or multi-year survey folder for assigning field computer survey data. Click the down arrow in the Survey field and select a survey in the selection list.
-
Periodic Survey, Year: Select this option to choose a periodic survey folder and the survey year for assigning field computer survey data. Click the down arrow in the Periodic Survey field and select a periodic survey folder in the selection list. Then click the down arrow in the Year field and select the survey year.
Click Apply to all selected files if you want to apply the selected survey folder option to all selected survey files.
Click ![]() Import to import selected survey file(s) into PCS.
Import to import selected survey file(s) into PCS.
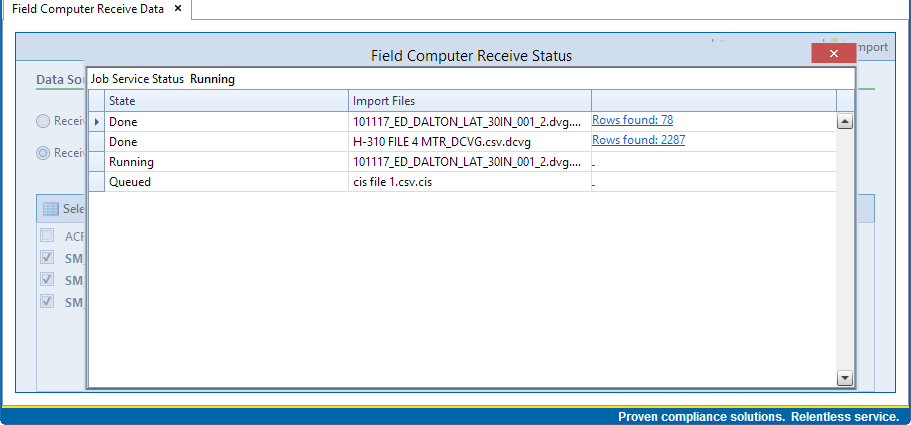
The Field Computer Receive Status window displays showing the status of the import process.
Click ![]() Retrieve File(s) to view a list of survey files available for selection.
Retrieve File(s) to view a list of survey files available for selection.
Select the survey files you want to transfer from the Field computer. Click the check box for one or more survey files in the list of files available for selection.
Click ![]() Import to open the Survey Information dialog box.
Import to open the Survey Information dialog box.
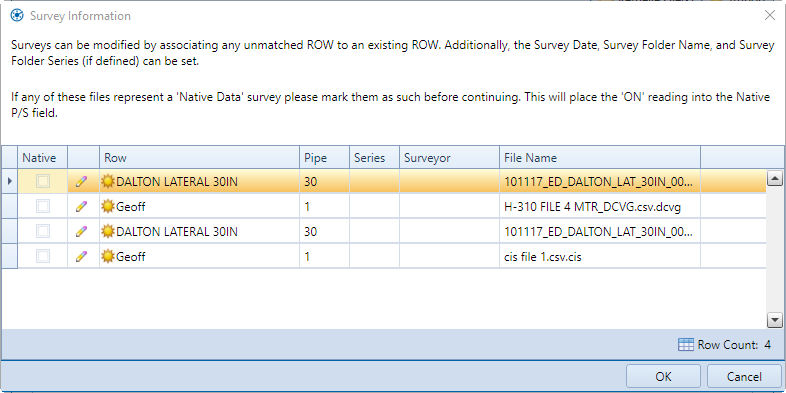
If you are importing a survey file with native survey data, click the Native check box.
If you want to associate one or more existing pipeline Series with the survey, complete the following steps:
-
Click the
 pencil icon to open the Edit Survey Information dialog box.
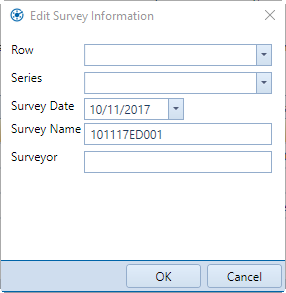
Edit Survey Information
-
Click the Series field and select a pipeline Series in the selection list that you want to associate with the survey.
-
Click the Row field and select a pipeline segment in the selection list that you want to associate with the survey.
-
If you want to change the date the survey was taken, click the down arrow in the Survey Date field and choose a survey date using a calendar. You can also type a survey date in the field using the format MM/DD/YYYY to indicate the month, day, and year.
-
If you want to change the name of the survey file, type a survey name in the Survey Name field.
-
If you want to change the name of the person who took the survey, type a name in the Surveyor field.
-
Click OK to close the Edit Survey Information dialog box. Updated information displays in the Survey Information window.
-
Click OK to close the Mark Native dialog box and import the survey file.
The Field Computer Receive Status window displays showing the status of the import process.
Survey data imported from the Allegro is indicated in the Edit ISM Data grid with information in the Allegro Survey Information field.

